The Ice Cream Machine
An absurd computer with even more absurd documentation for my favorite jamf buddy.
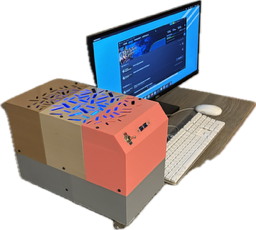
I worked on this project in 2025 for one of my jamf buddies that I knew would appreciate an absurd computer with entertaining documentation. I mailed it across the country with a linux thumb drive and the 32 pages of setup. It's intended to be a remote gaming machine with NAS and Time Machine functionality, with future plans for use as an offsite backup and a docker playground. It could even be hosting this blog. It's not, but it could.
Despite validating the guide on the hardware itself, there are at least two syntax errors, a couple of things that were explained wrong, and at least one bad idea- and they all shipped. Hey, it worked when it was my machine. I had lots of fun. This isn't designed to be reproduced, so I'm leaving the mistakes in. To save some time if you use parts of the guide: Tailscale doesn't really work with CIDR notation without a lot more setup, and you should look up the url for sunshine latest.
The guide is half joke, half pedagogical ramp- it gets pretty deep. As a learning opportunity for myself, I did consider making a part 2: automating the set up with Ansible, but I think it's probably better to learn on virtual machines rather than somebody else's machine. That guide is definitely coming.
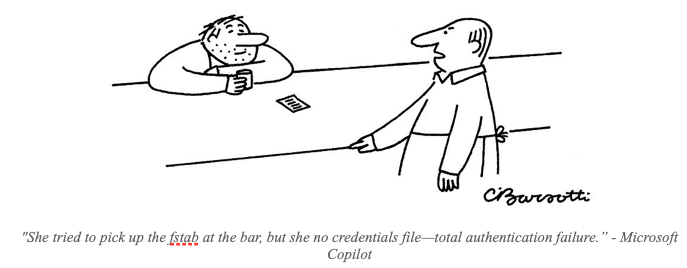
Also, Copilot really did write the fstab joke, but it was me who left out a word copying it.

1/32
Table of Contents
-
Introduction …………………………………………………………………… 2
-
Step 1: Install the OS ……………………………………………………… 3
-
Step 2: Remote Login ……………………………………………………… 6
- Nvidia drivers …………………………………………….……………… 6
- Sunshine …………………………………………………………………… 7
- Tailscale …………………………………………………………………… 13
-
Step 3: RAID …………………………………………………………………… 14
- Create the filesystem ………………………………………………… 16
-
Step 4: Samba ………………………………………………………………… 20
- SMB credentials ………………………………………………………… 24
- Time Machine …………………………………………………………… 25
- Getting Hard ……………………………………………………………… 27
-
Step 5: Media Servers ……………………………………………………… 28
-
Assembly and Disassembly ……………………………………………… 31
Further Reading
- Feeling at Home with Linux ………………………………………………… 9
- Notes on RAID …………………………………………………………………… 18
- For Your Future Consideration …………………………………………… 22
- Fstab ………………………………………………………………………………… 23
- Alternatives ………………………………………………….…………………… 30
- Warranty ………………………………………….………………………………… 32
2/32
Welcome to the Big Dumb Nerd Family!
Dear shloobs,
Congratulations! You've just taken the first step into a world of moderate performance, ice cream design, and directionless innovation. We’re thrilled to welcome you as the first customer. One day, we might have paying customers.
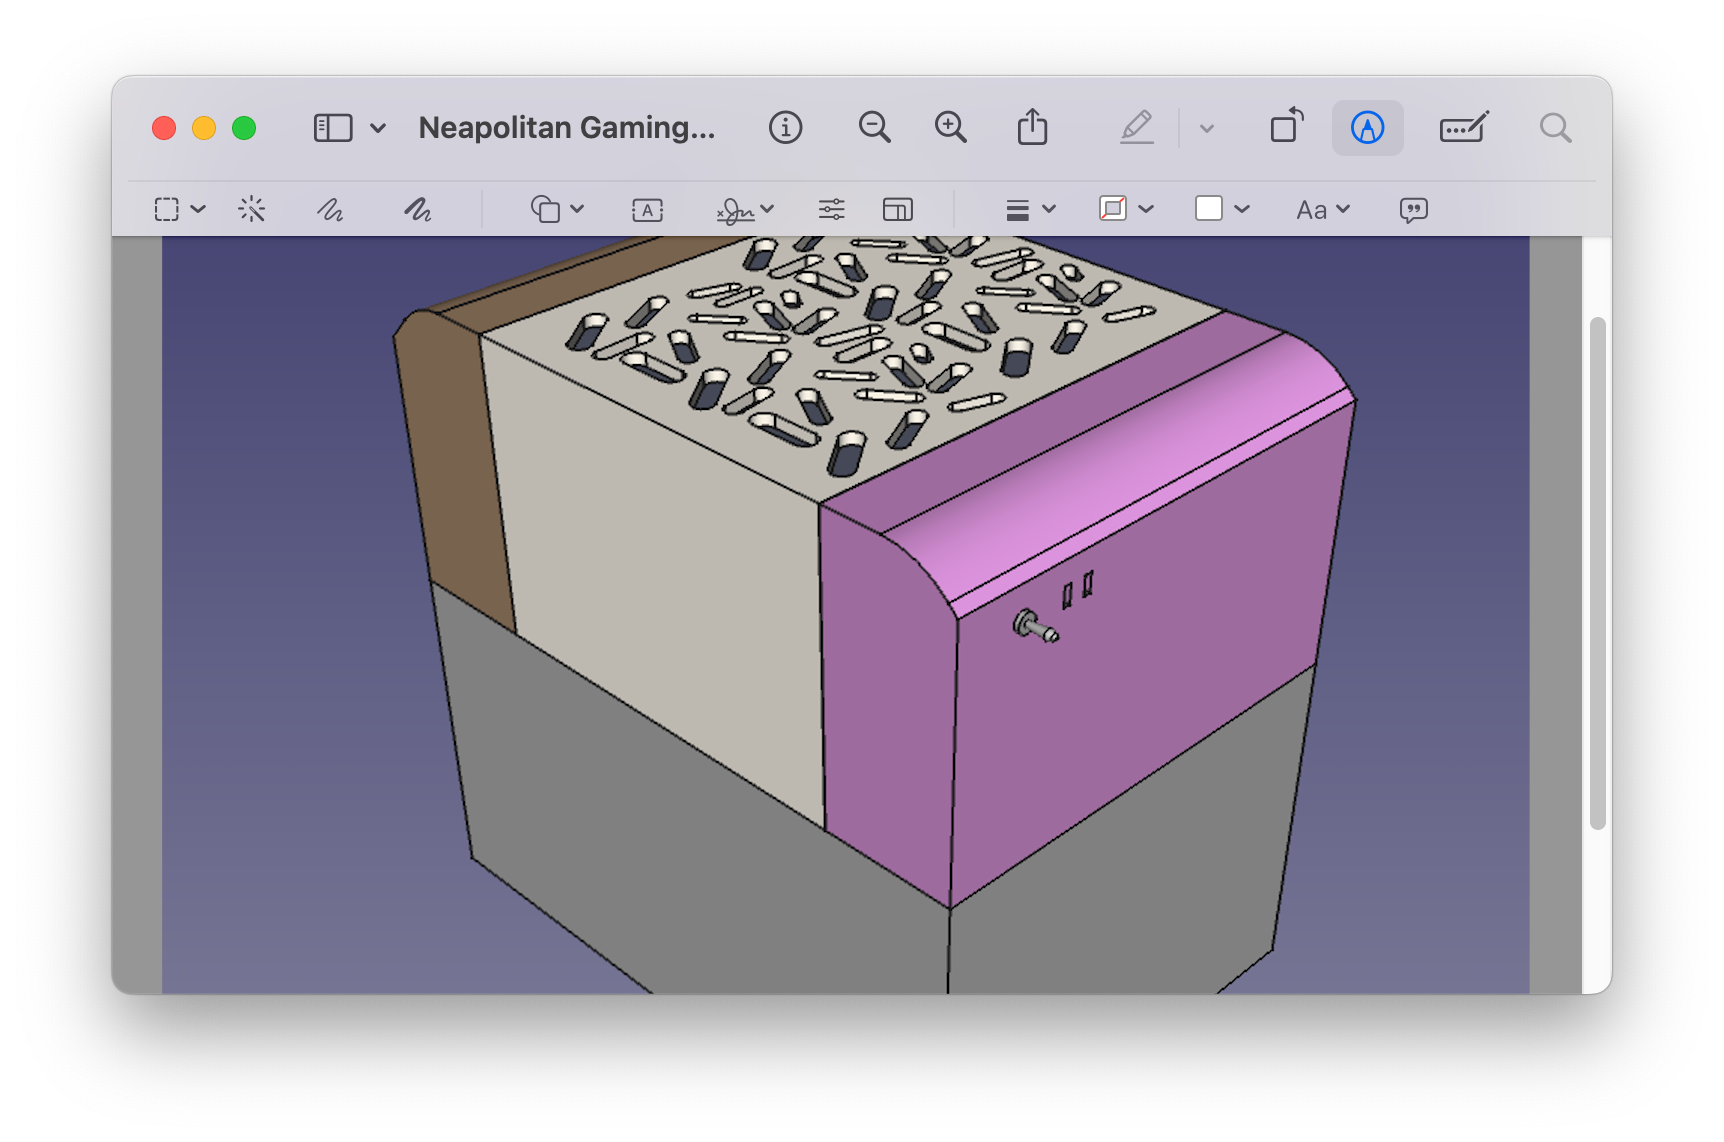
Your new computer isn’t just a device—it’s a gateway to endless troubleshooting, loss of productivity, and some possibilities. Whether you're diving into immersive entertainment or hoarding data that matters most, your Neapolitan Gaming NAS ™ is designed to keep up with you every step of the way.
Here’s what you can expect from us:
- 🔒 Security First: Nobody knows how to use Linux, so you’re safe.
- 🚀 Performance You Can Trust: Engineered with two different kinds of plastic and specs to make a 10 year old computer blush, performance and reliability are built in.
- 🎬 Media Mastery: Plex-ready for buttery-smooth streaming across all your screens. (Requires monthly subscription).
- 🗄️ Storage Central: Your NAS is built to keep your files organized, accessible, and secure. Your files are so easy to access, even a stranger could if they wanted it bad enough.
We believe technology should complicate, not empower. So we’ve made setup simple for nobody: You have to install the operating system, all the software, set up the raid array, and be responsible for any upgrades. You’ll be up and running in hours!
Thank you for choosing [Company Name]. We’re honored to be part of your journey.
Warm regards,
The Big Dumb Nerd Team

3/32
Step One: Install the OS
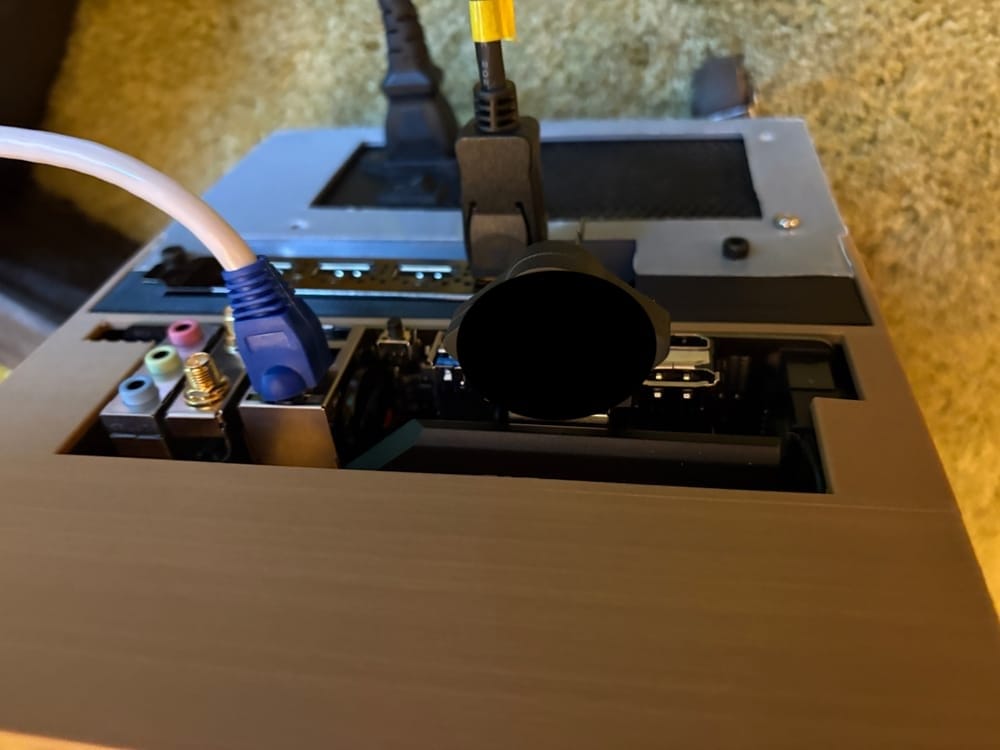
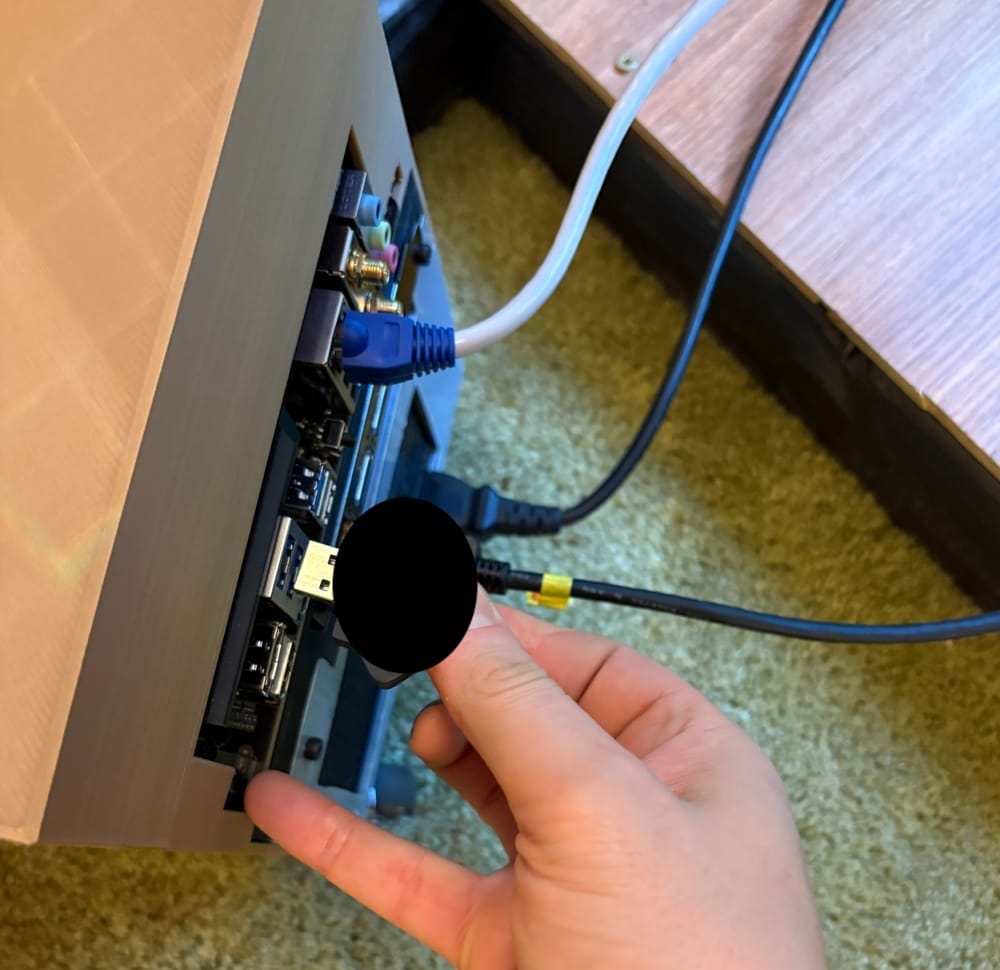
Connect the computer to a monitor, ethernet, and a keyboard/mouse. Insert the included USB Key
Gently activate the power switch and spam F12 on the keyboard. Choose UEFI: General Disk 5.00
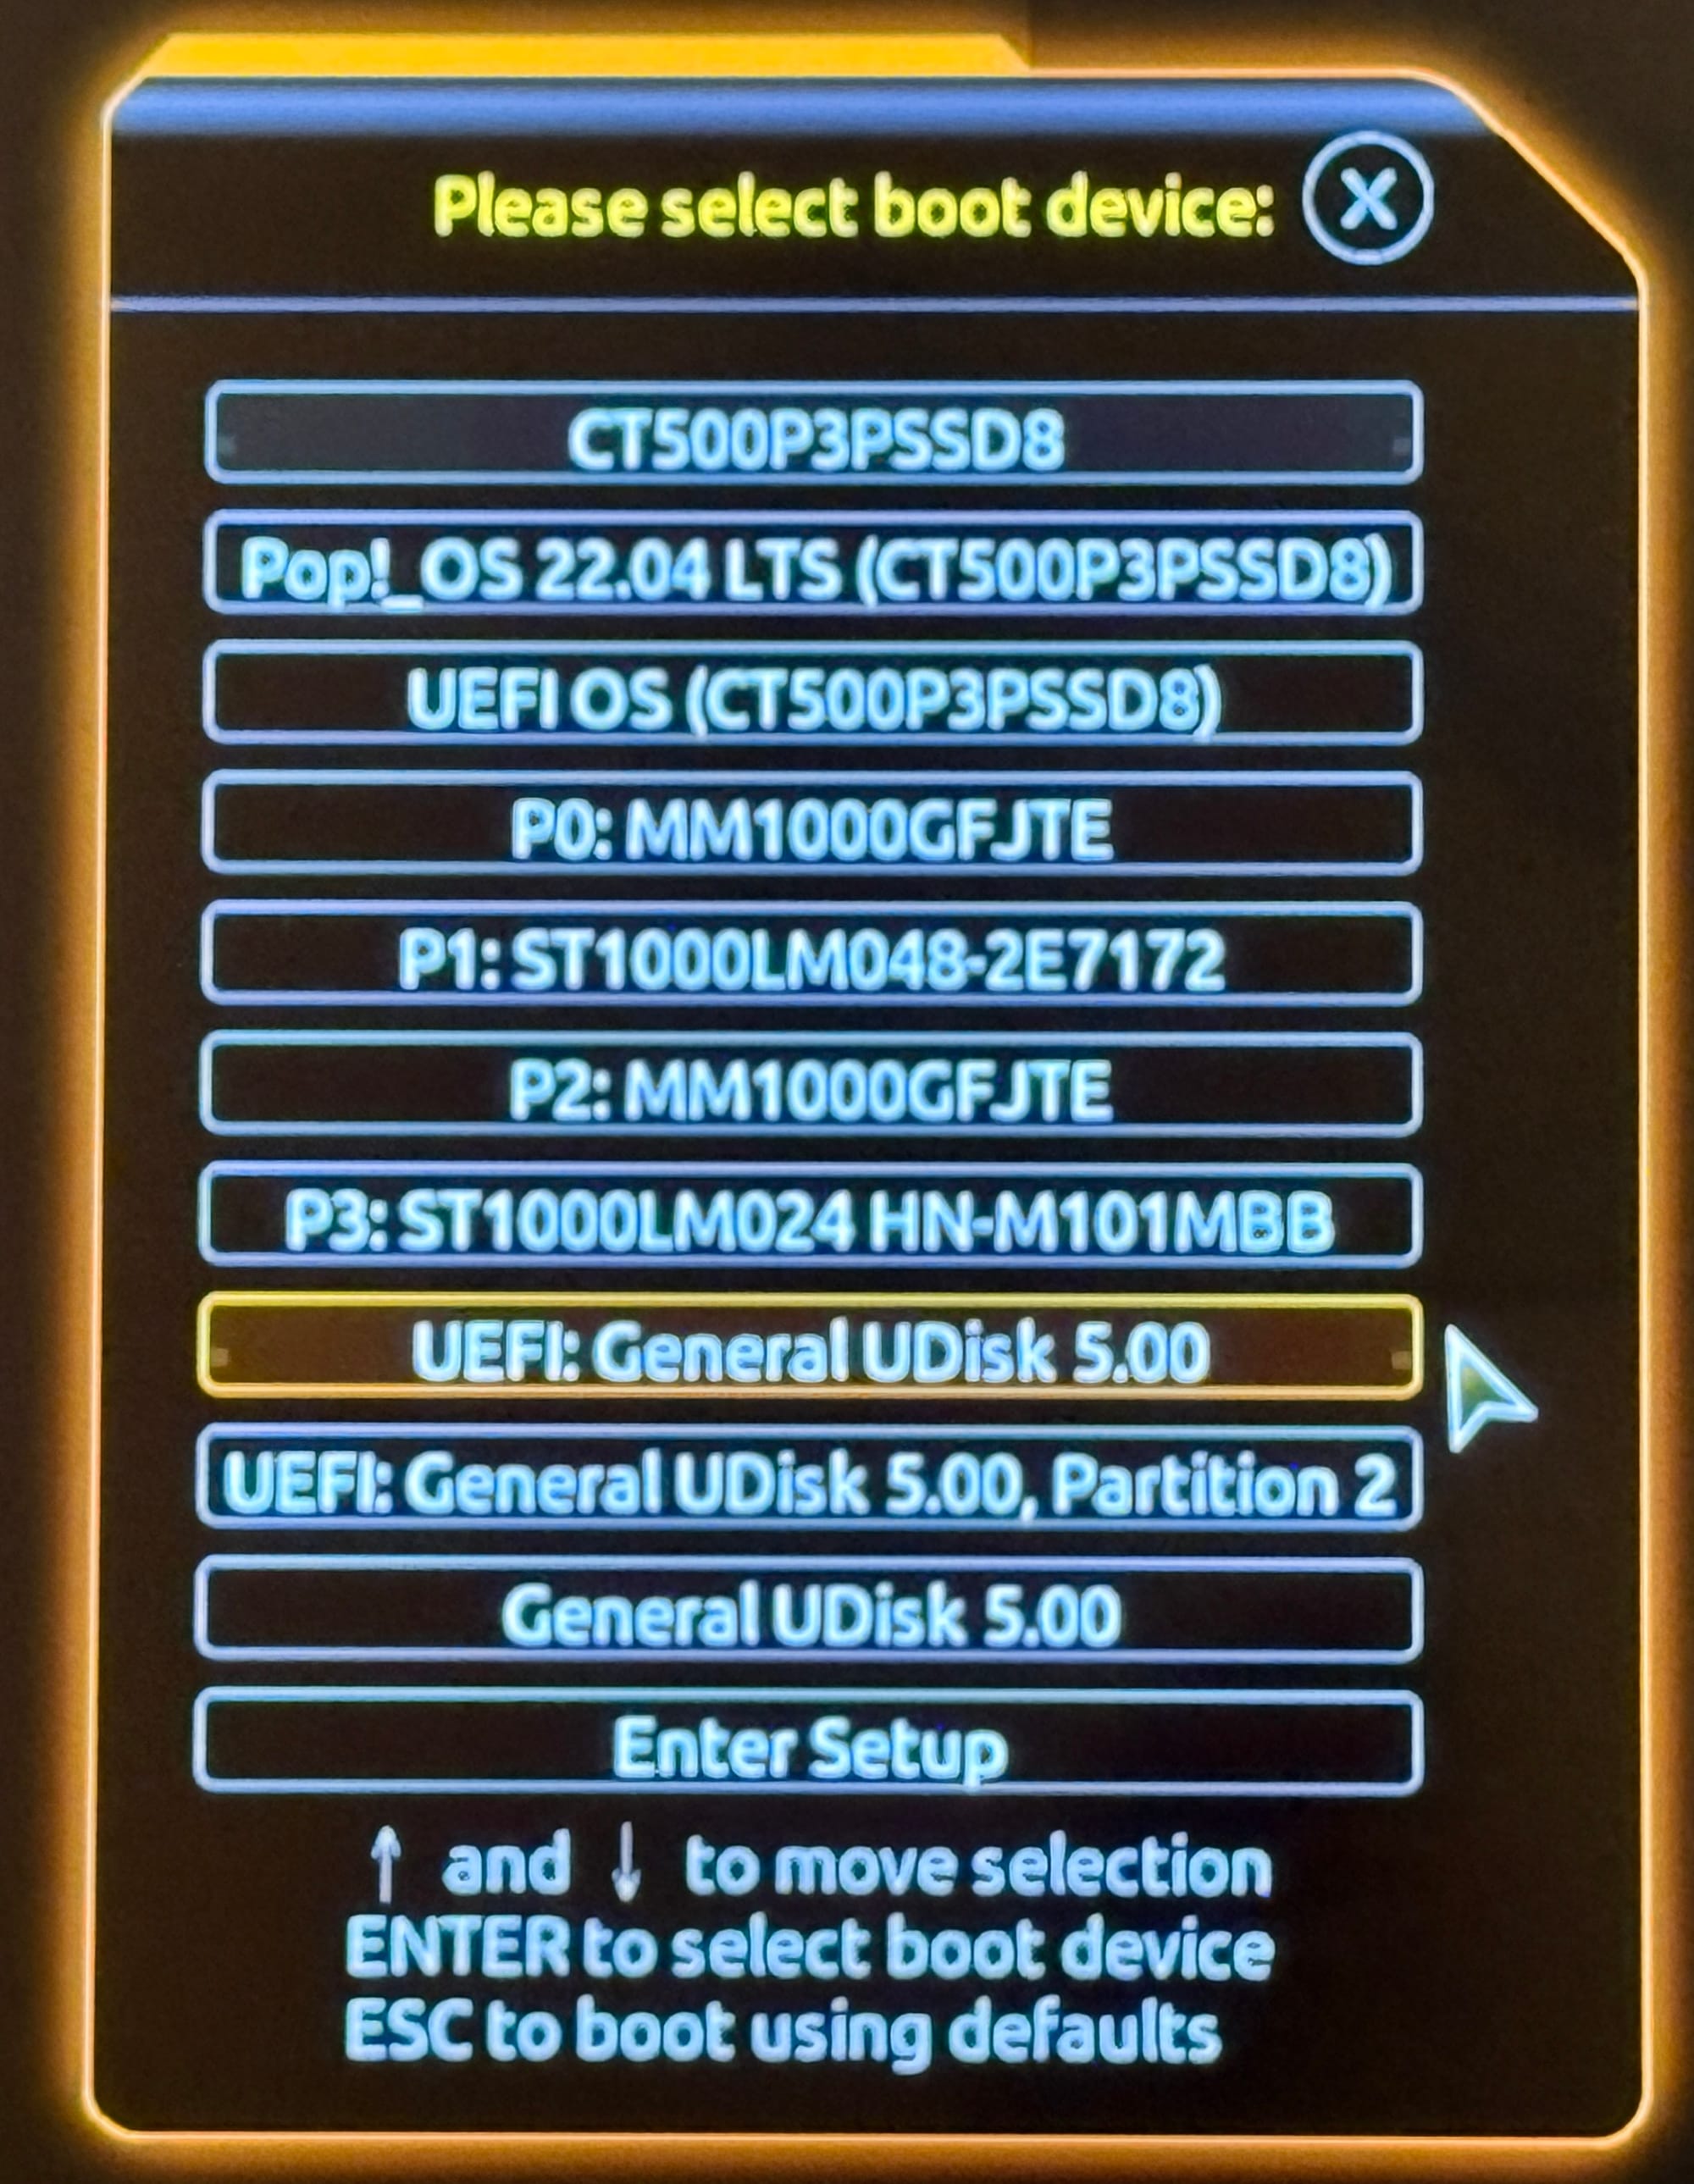
Gently activate the power switch and spam F12 on the keyboard. Choose UEFI: General Disk 5.00
4/32
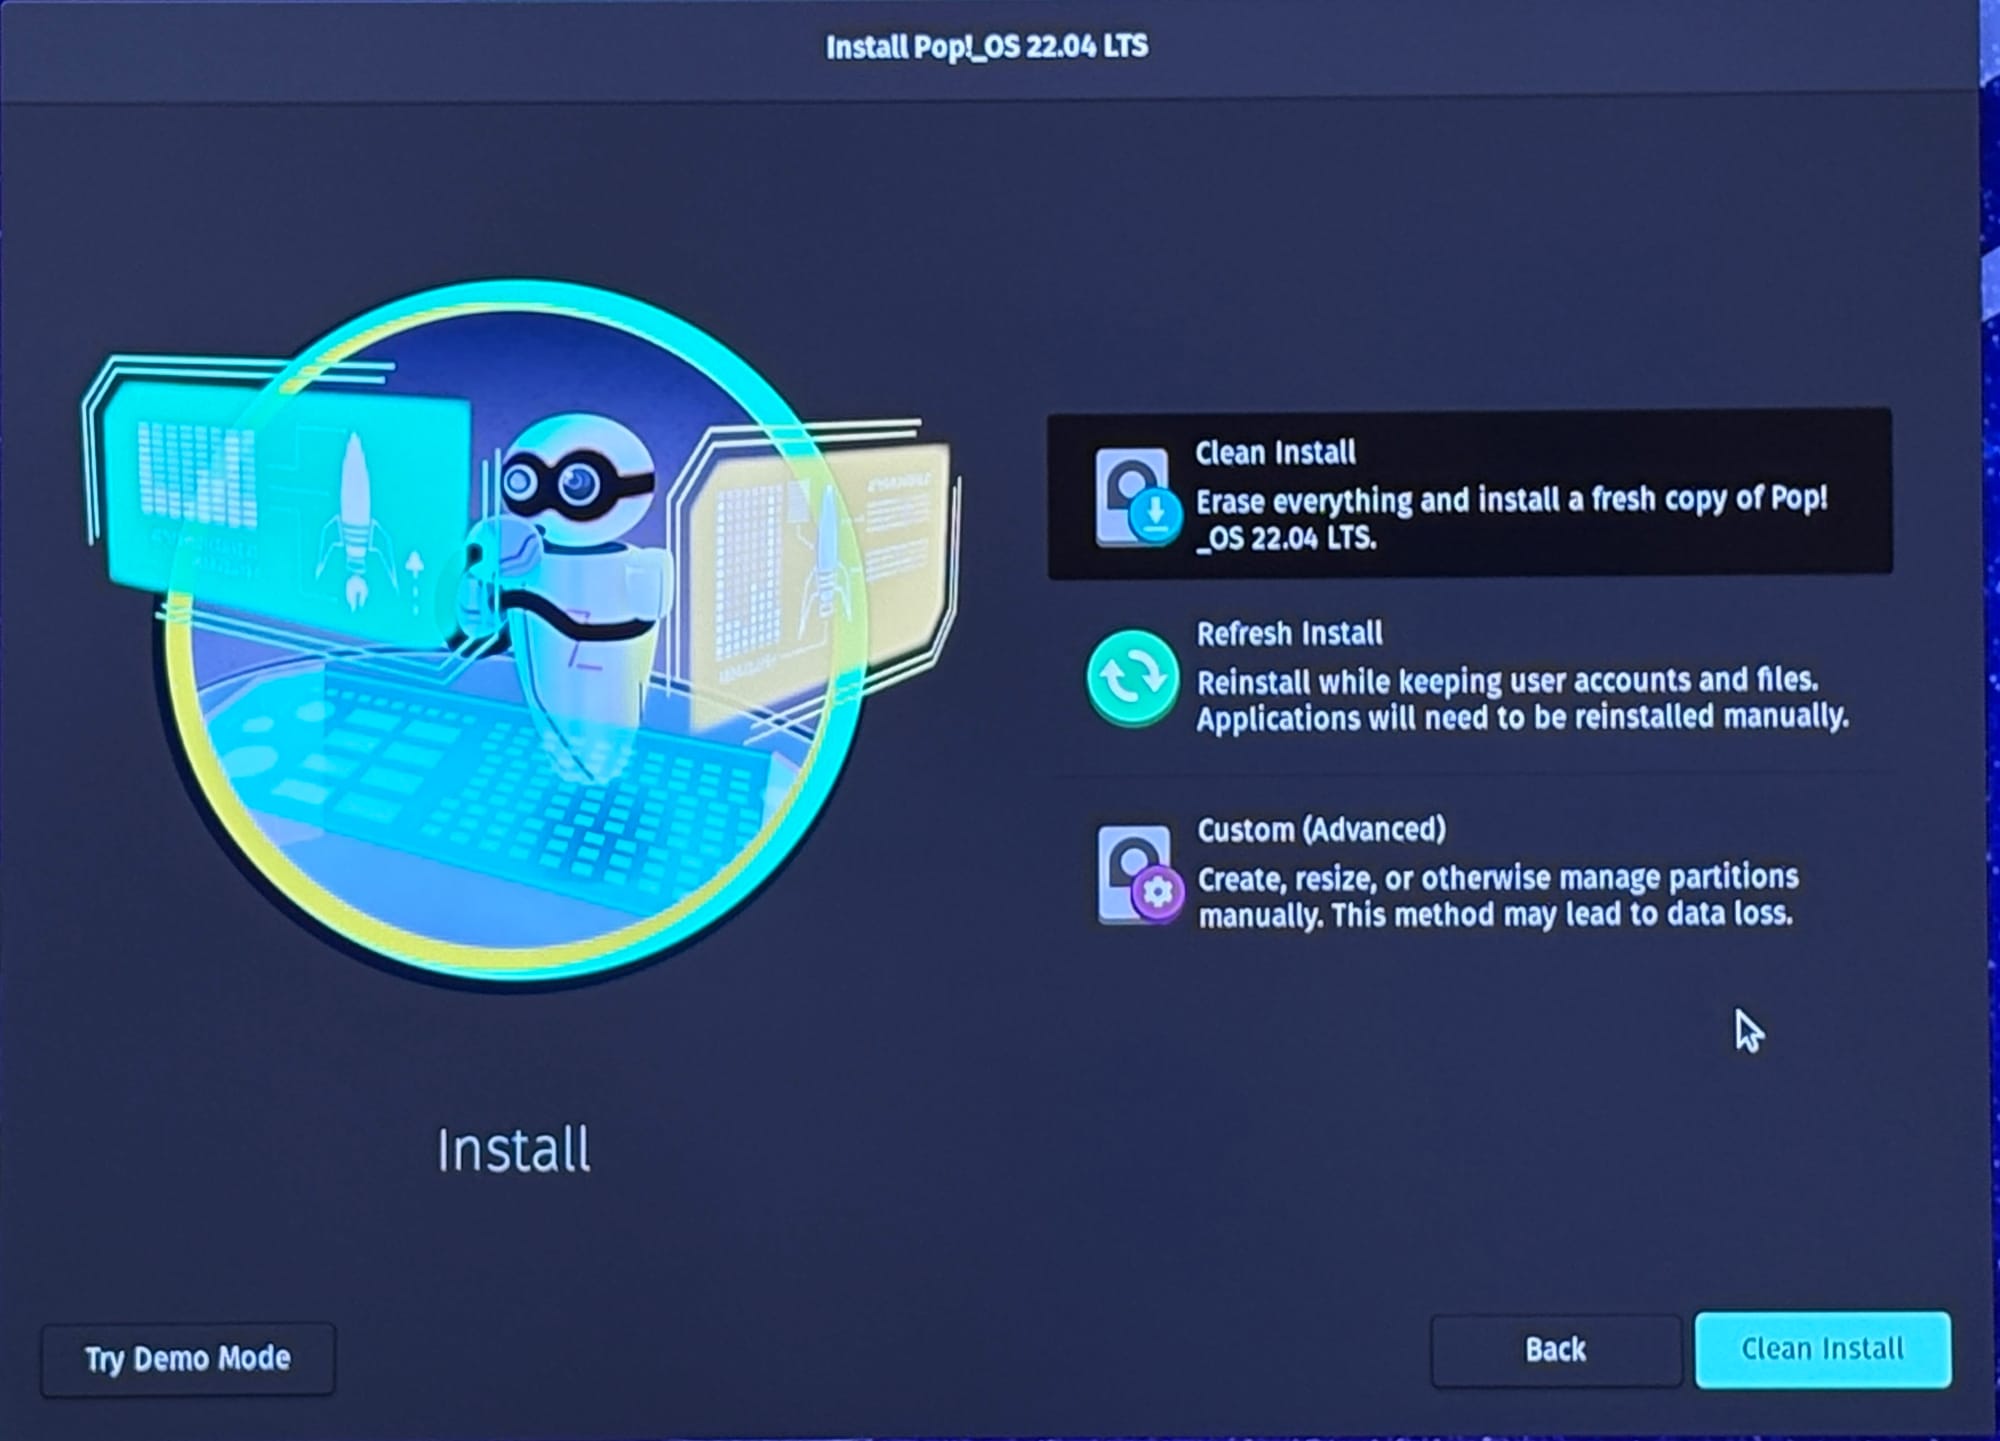
Proceed through the installer. You may want to choose Macintosh keyboard layout.

Choose Clean Install
5/32
Erase and Install to CT500P3PSSD8. Ignore the other drives.
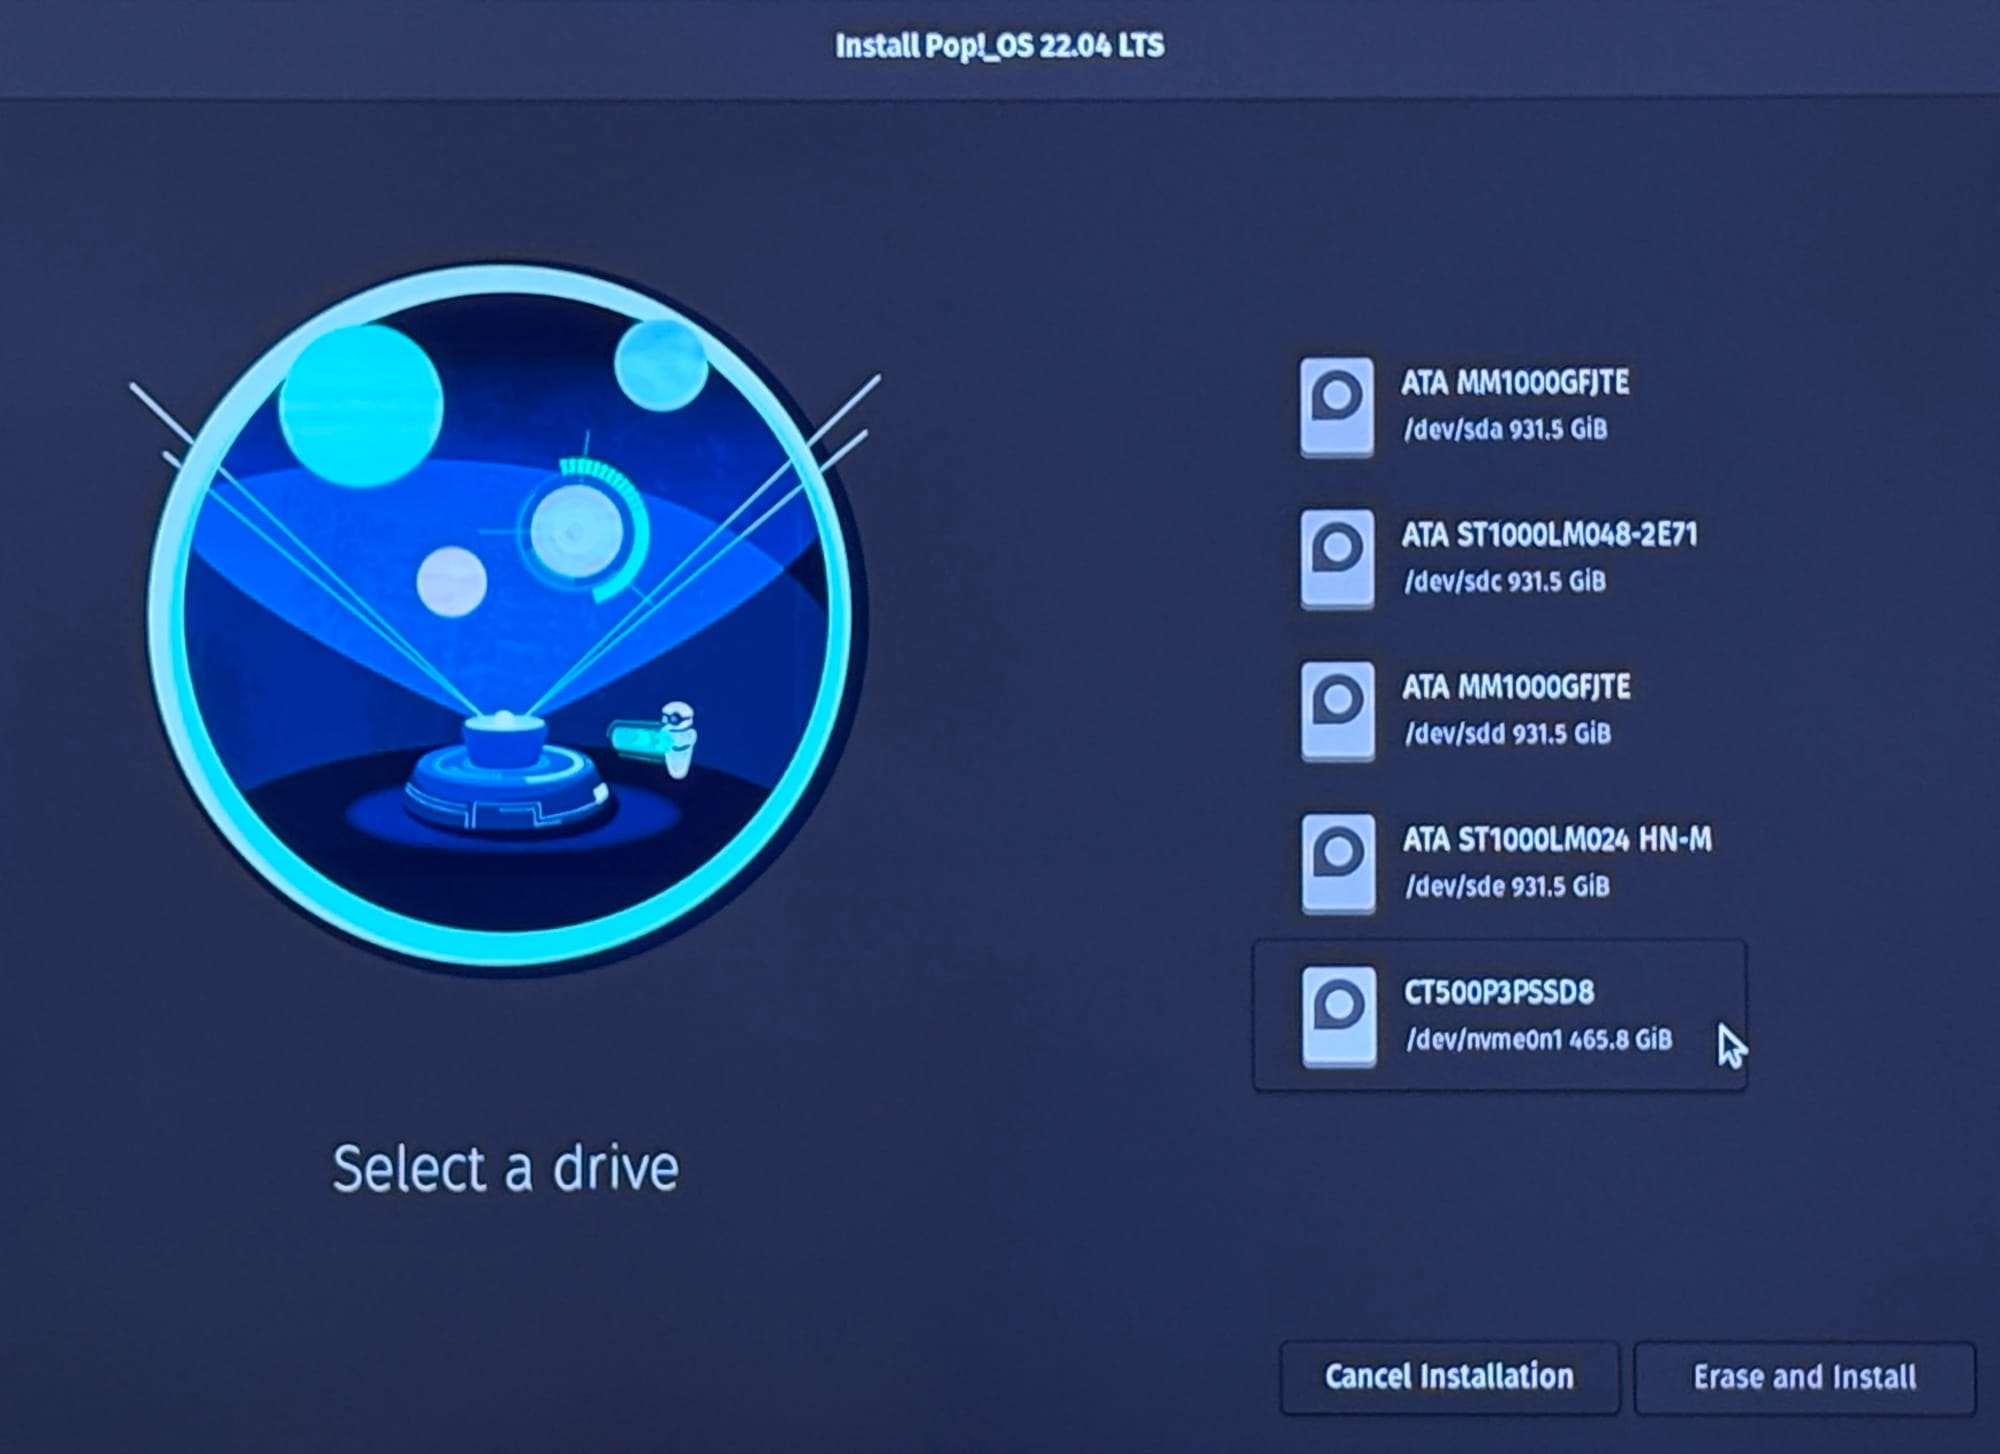
You’ll be prompted to choose a username, encryption, and time zone. That’s up to you, but keep in mind enabling encryption will require intervention during a power outage since it behaves like FileVault. It should install pretty fast- around 5 minutes. When finished, choose shutdown.
Remove the USB key.
6/32
Step 2: Set up remote login
You just installed Linux! 🎉
Log in with the username and password that you created and you’ll have some basic set up for the dock, clock position, and internet accounts.
Update repositories
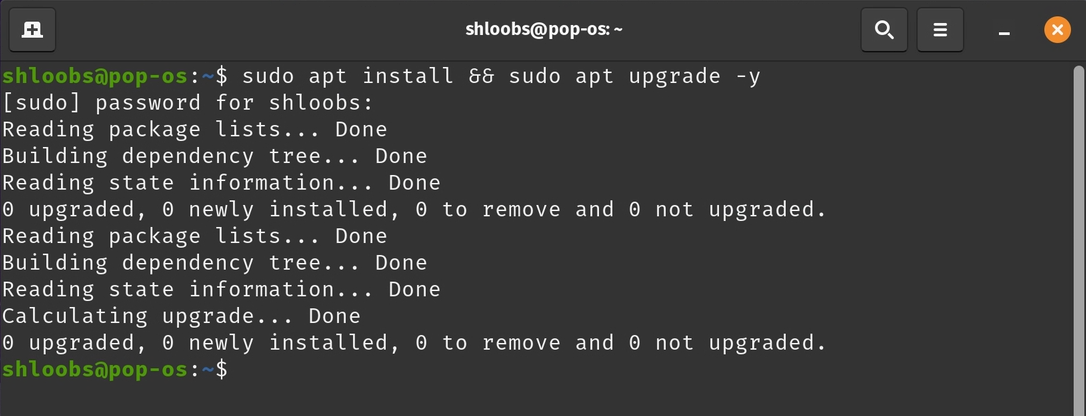
Open the Terminal and run:
sudo apt update && sudo apt upgrade -y
Watch it go brrrrr. It is the same as softwareupdate --install —recommended in that it only updates packages and not the OS version. Linux is not as monolithic as macOS is, so package updates will be enough for this version of Pop! OS 22.04 LTS (long term support) for the life of the hardware. This also updates the repositories for any future software you might install.
2a Install nVidia Drivers
Pop OS comes with its own drivers from System 76, but let’s use the most up-to-date drivers from nVidia:
sudo ubuntu-drivers install
We can check the device information by running:
nvidia-smi
7/32
2b Install Sunshine
Open the Terminal and run:wget https://github.com/LizardByte/Sunshine/releases/download/v2025.829.135256/sunshine-ubuntu-22.04-amd64.deb
It should download to your home folder. Now let’s install the package with dpkg.sudo dpkg -i sunshine-ubuntu-22.04-amd.deb
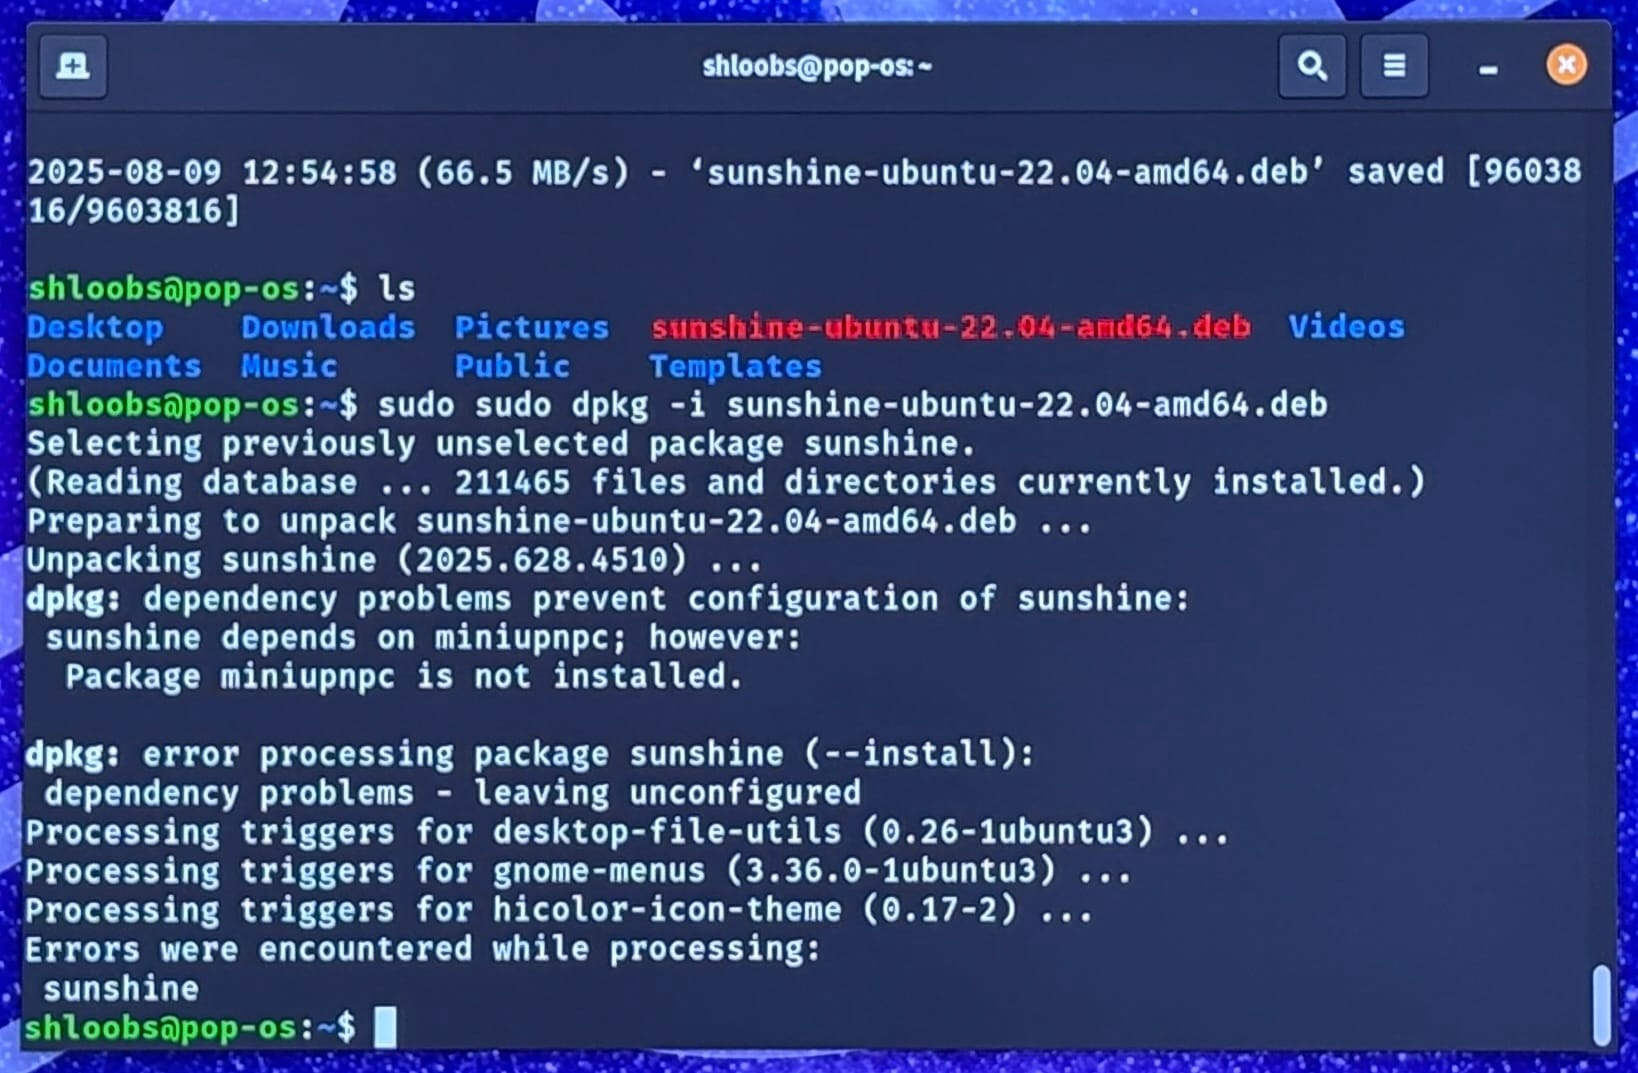
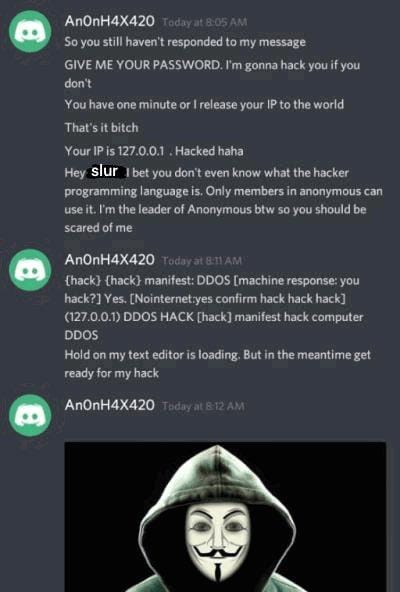
It didn't work, did it?
8/32

9/32
Feeling at Home with Linux:
a public service announcement
This version of Pop OS 22.04 LTS uses bash as the default shell, so use it just like you would on macOS. The file structure is also similar with the filesystem beginning at /. /bin, /etc, /var and so on are all used the same way in linux. Notable exceptions include:
| macOS | Linux |
| /Volumes |
/Wherever We Want Usually /mount |
| /Users | /home |
| ⌘‑v to paste in terminal | Ctrl‑Shift‑V to paste in terminal |
Linux also stores much of its configuration in plain text in /etc
| File | Explanation |
| /etc/fstab | Contains which drives and where to mount them at startup. Also used for auto‑mounting network shares |
| /etc/apt/sources.list.d/ |
List of repositories used by the package manager. Always run apt update after editing.
|
| /etc/crontab | Scheduled tasks |
| /etc/samba/smb.conf | smb settings and credentials |
Quick Reference Guide
| Command | Notes |
| sudo systemctl [option] [service] |
sudo systemctl daemon-reload sudo systemctl status plexmediaserver sudo systemctl enable sunshine Equivalent of launchctl in macOS |
| sudo mount -a | Mounts everything in /etc/fstab |
| sudo apt update && apt upgrade -y | Updates repositories and upgrades packages with no confirmation |
| sudo nano /etc/configfile | Opens text editor in the terminal (same as macOS, you just do it more) |
| sudo apt install [app name] | Used more often than dpkg. |
10/32
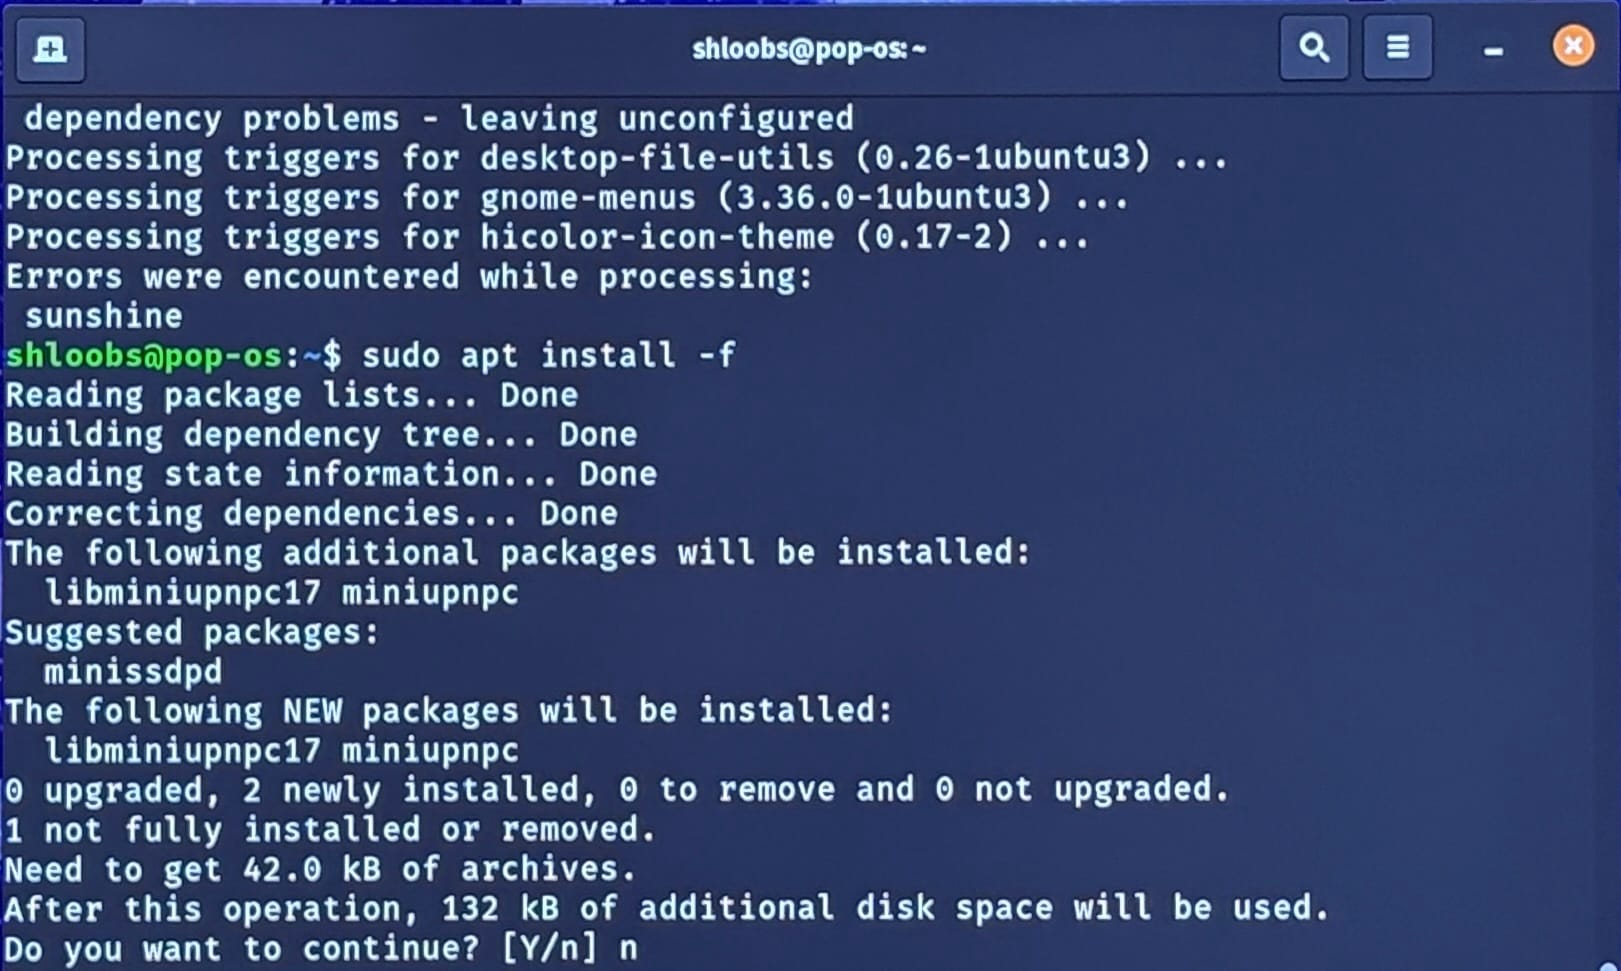
Installing Sunshine (con’t)
dpkg doesn’t try to install dependencies like apt does. We’re missing some dependencies. We could install them individually, but we fancy
sudo apt install -f
There are still some things we want to do:
mkdir -p ~/startup
nano le_script.sh
In the file, enter
#!/bin/bash
sunshine &
sleep 3
#lock screen with gnome-screensaver
gnome-screensaver-command -l
ctrl-x to save and exit
11/32
Installing Sunshine (con’t)
Install gnome screensaver:
sudo apt install gnome-screensaver -y
Enable Auto-login:
sudo nano /etc/gdm3/custom.conf
Uncomment these lines and add your username
AutomaticLoginEnable = true
AutomaticLogin = shloobs
Ctrl-x to save and exit.
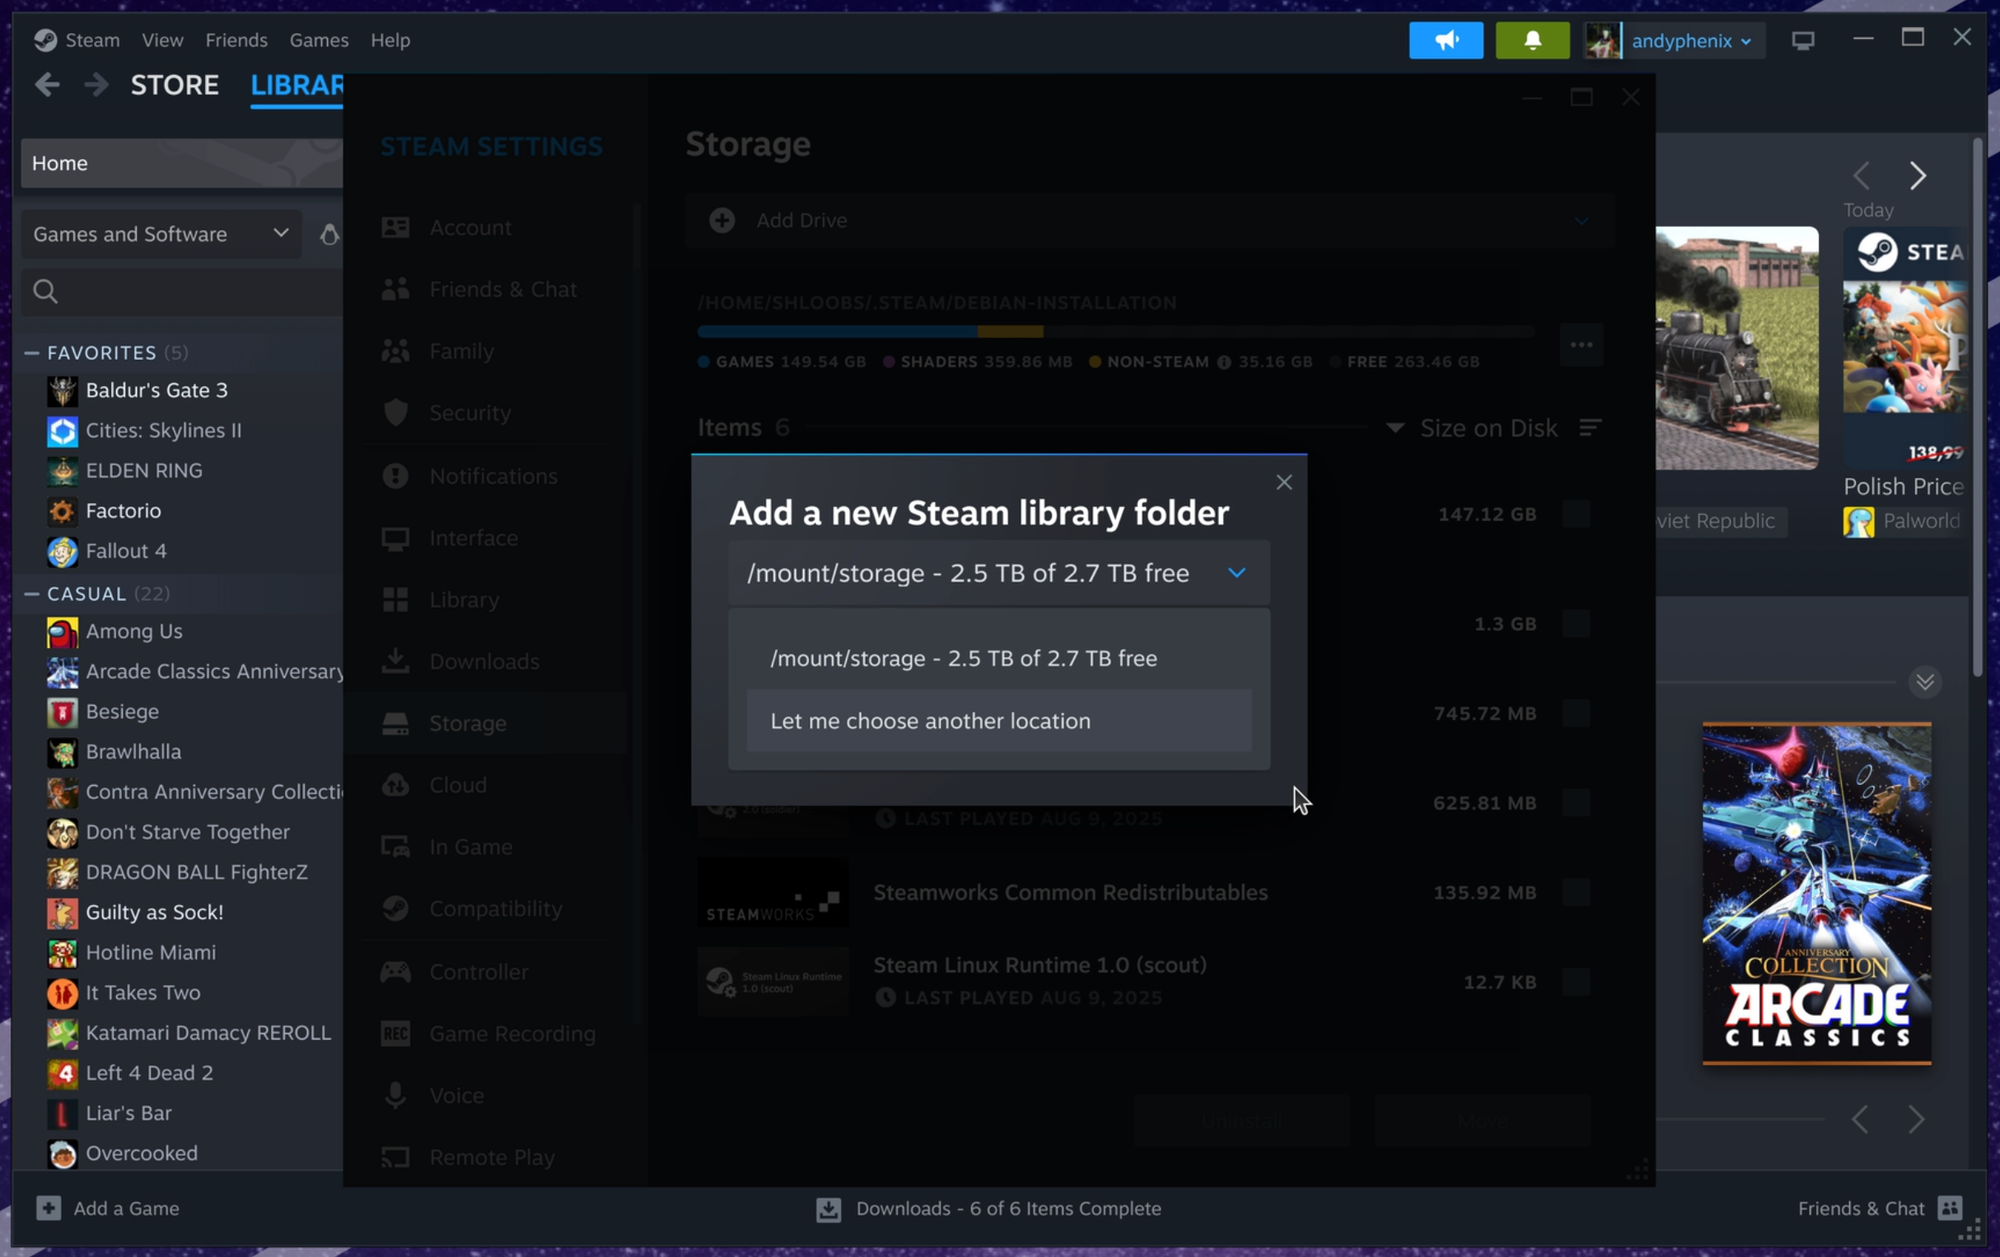
Install Steam:
sudo apt get install steam -y
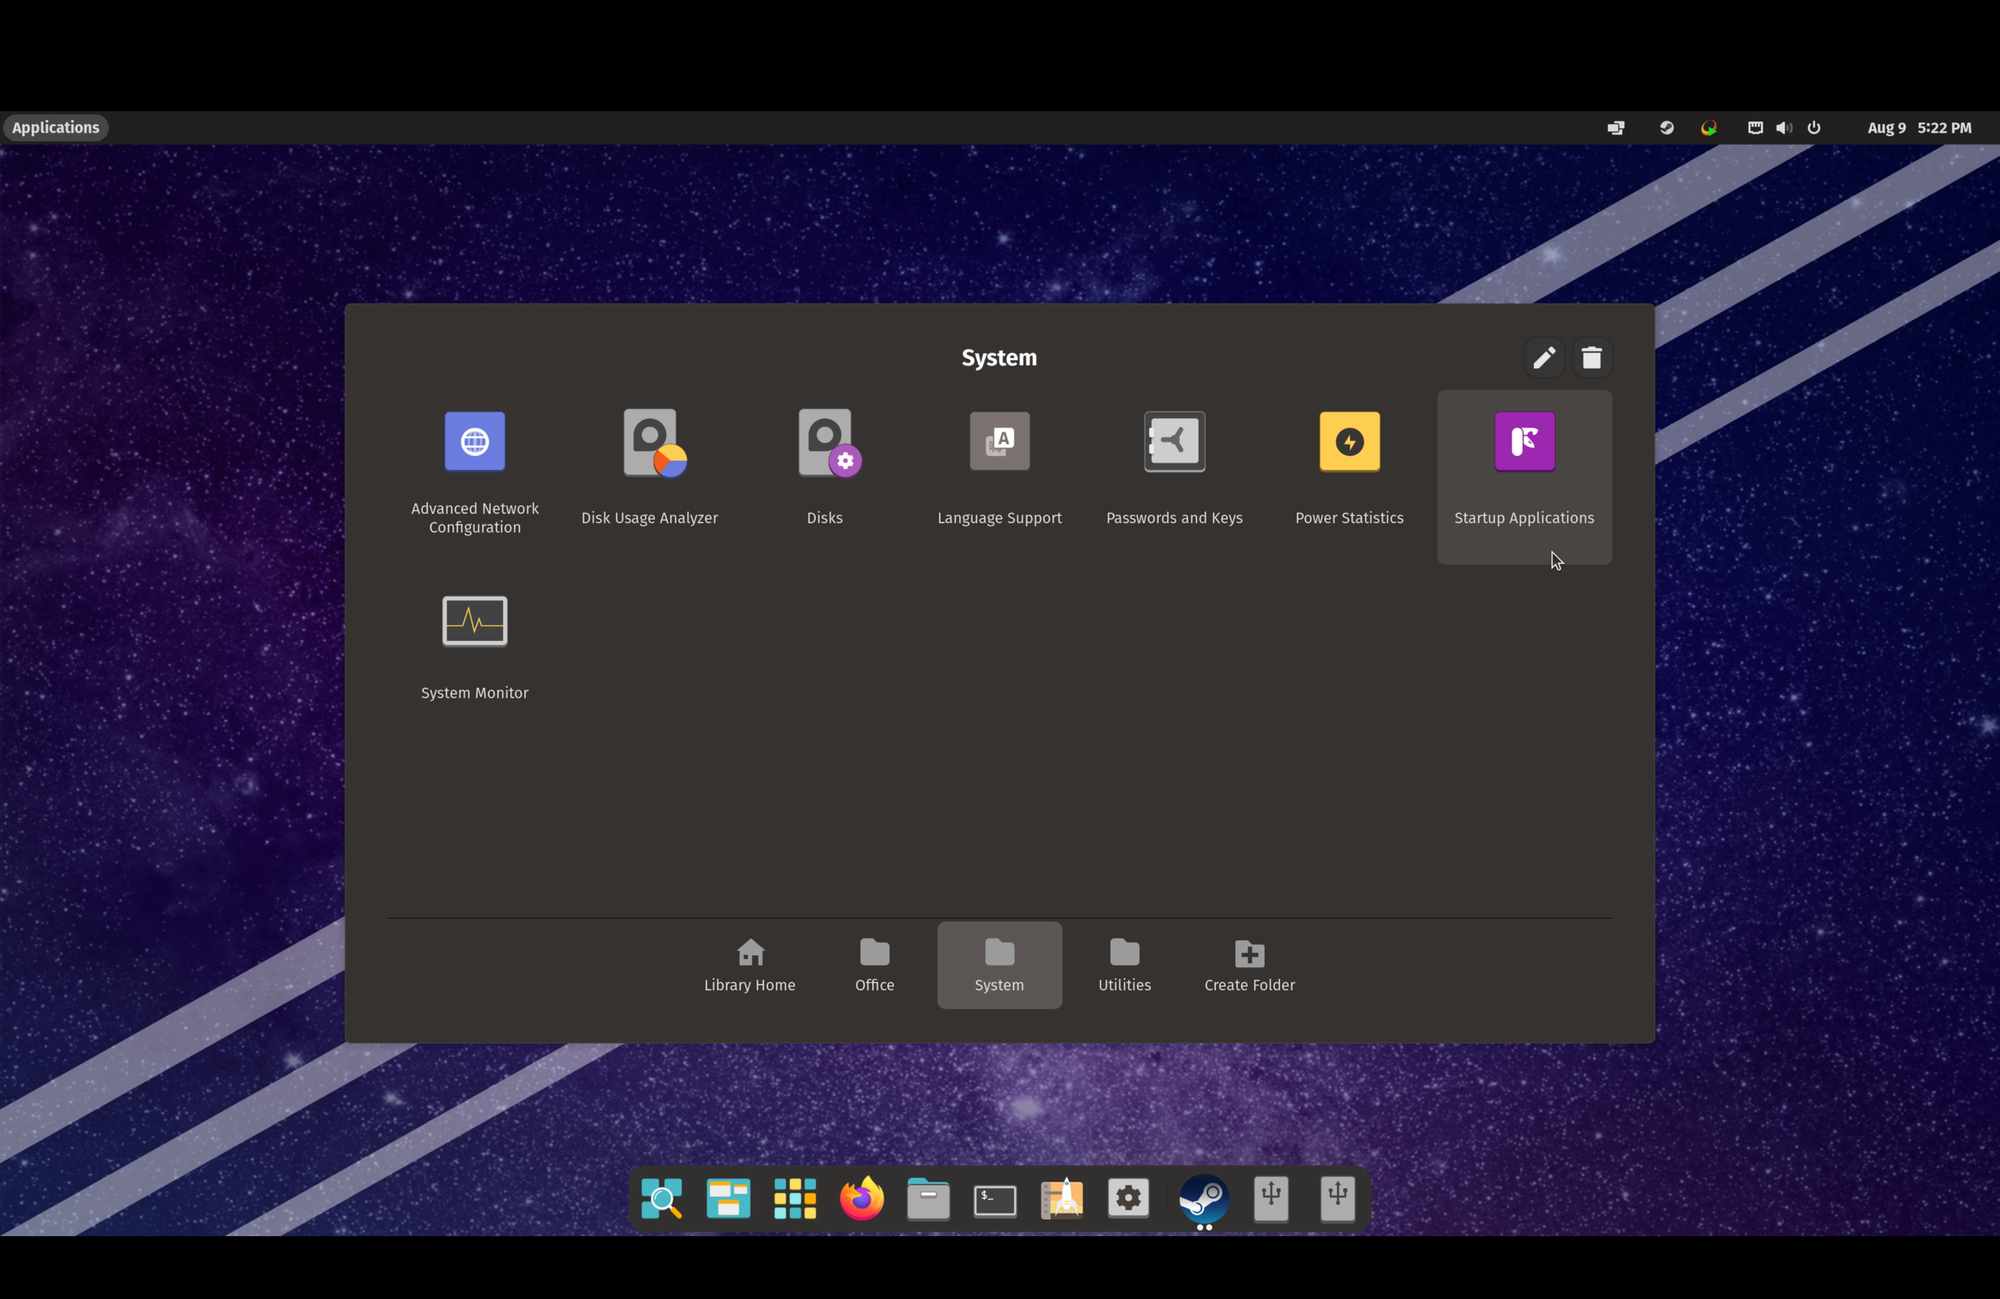
Add le_script and steam to login items:
12/32
Installing Sunshine (con’t)
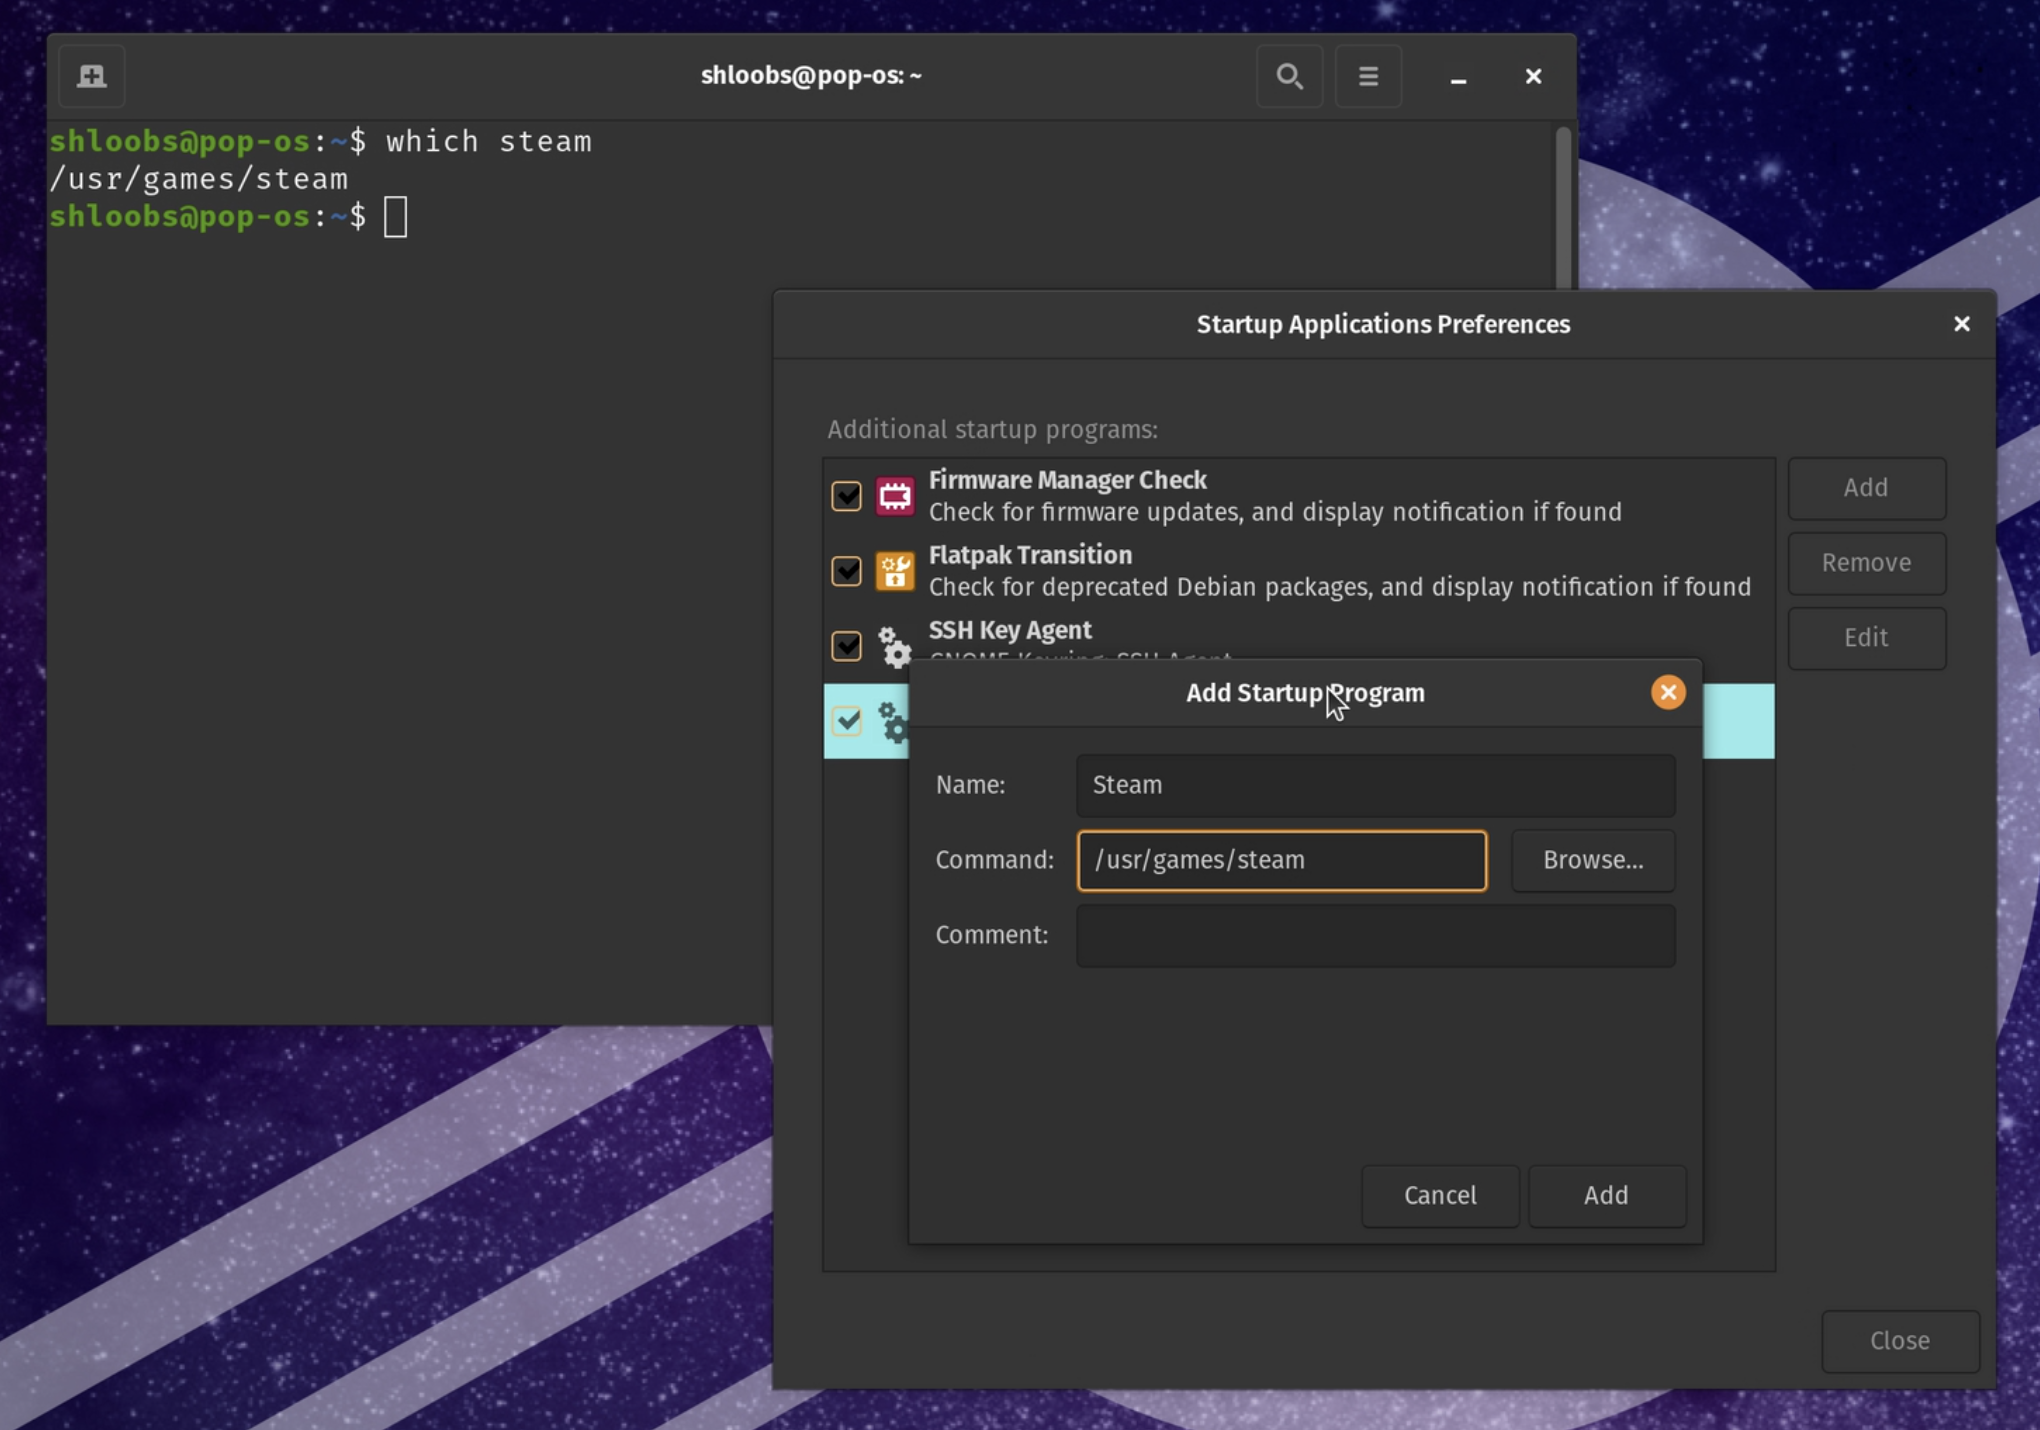
If necessary, find the correct steam directory with which. Don’t forget, you’ll also want to add le_script.sh
Recap: We Installed sunshine, set your account to log in automatically, open sunshine, and auto lock your account after login for a security layer.
You can reach sunshine by opening the app, or going to:
http://localhost:47990
Restart, verify you are able to restart and remote in before going headless with the dummy plug. You can do the rest of the administration from your Macbook with
https://moonlight-stream.org
13/32

2c Install Tailscale
The Final entry into the 2 Trilogy
In the terminal:
curl -fsSL https://tailscale.com/install.sh | sh
The service is called tailscaled, so if you want to check its status
systemctl [status/start/stop] tailscaled
Not so fast! You thought this was going to be easy, didn’t you?sudo tailscale upis supposed to open a browser for authentication. Sometimes it doesn’t. Let’s fix that.
Open this in a web browser:
https://login.tailscale.com/a/abcdef123456
-or-
Login to the admin console and get your auth key.
sudo tailscale up --authkey <your_auth_key>
The tailscale admin console is fairly straightforward. You can use the server as an exit node so all your devices look like they’re coming from it, or you can share only specific services like smb. If you install the iOS app, you can even access your smb share on 5g.
14/32
Step 3: Create RAID array with mdadm
In the terminal, enter:
lsblk -o NAME,SIZE,TYPE
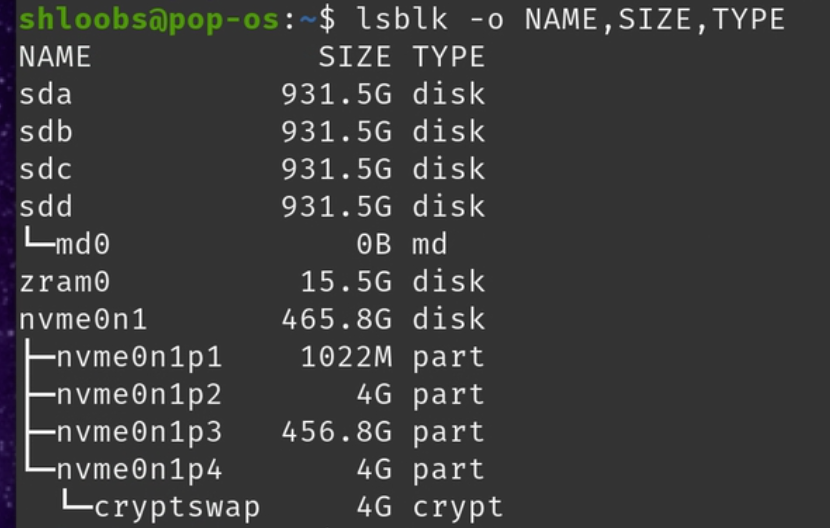
Make a note of the drives that are 931G. Should be sda, sdb, sdc, and sdd. If not, substitute your device names in the following commands.
Stop the array from the the previous setup:sudo mdadm --stop /dev/md0
Create the raid array (see p18 for more information):
sudo mdadm --create --verbose /dev/md0 --level=5 --raid- devices=4 /dev/sda /dev/sdb /dev/sdc /dev/sdd
15/32
Check the status of the array.
cat /proc/mdstat
and
mdadm —detail /dev/md0
Oh… we’re gonna be here a little while. We can still use the computer, just don’t turn it off.

16/32
Step 3: Create RAID array with mdadm (con’t)
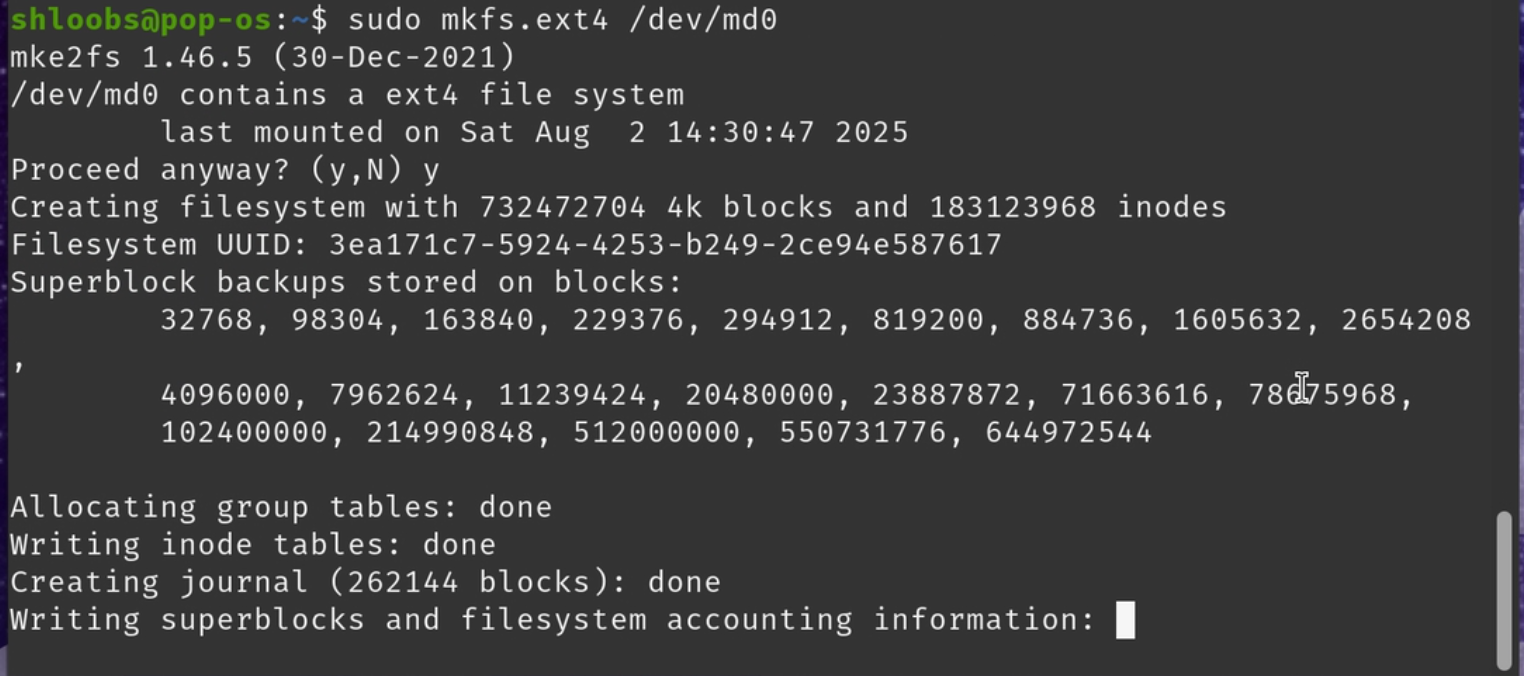
Create the filesystem:
sudo mkfs.ext4 /dev/md0
Create the mount point. You can name it anything you like.
sudo mkdir -p /mount/storage
Mount the filesystem and test it:
sudo mount /dev/md0 /mount/storage
sudo touch /mount/storage/yourfirstfile
ls /mount/storage
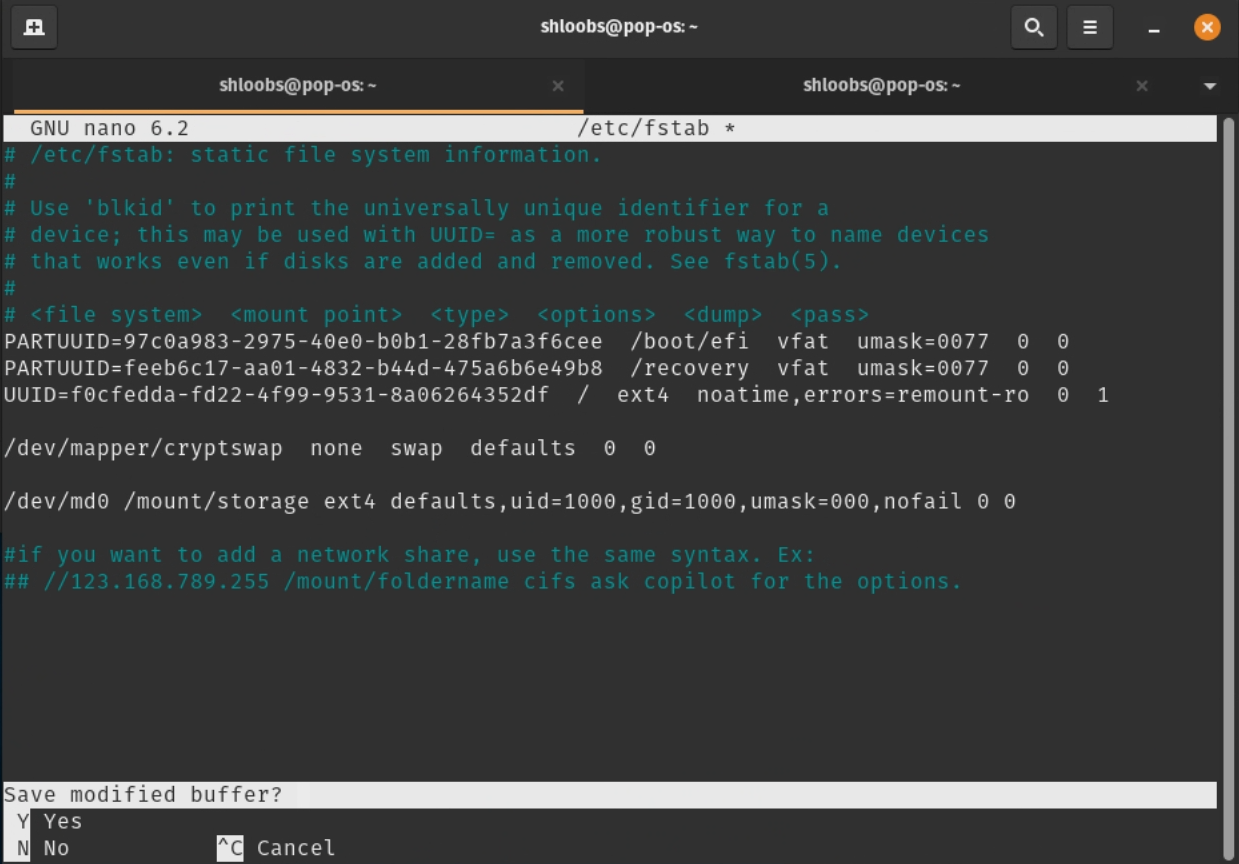
Edit /etc/fstab to mount automatically:
sudo nano /etc/fstab
Add the following line:
#Note: this is one (1) line
/dev/md0 /mount/storage ext4 defaults,uid=1000,gid=1000,umask=000,nofail 0 0
17/32
Then run:
sudo systemctl daemon-reload
sudo mount -a
sudo chmod -R 777 /mount/storage
18/32
Notes on RAID:
Your Neapolitan Gaming NAS™ comes equipped with 4 2.5” hard disk drives (HDDs) with 1TB capacity each.
RAID5 distributes the data across the disks and uses one as parity. Capacity is calculated by the sum of n-1 disks where n is the total number of disks, so we get 3*931G =2793G =2.79T
We also get a boost to read speeds, since there our data is spread across three disks. Writes do not get a boost. Because parity writes get written to a single disk, that is limited to the speed of the slowest disk. It should be fast enough to store some older games on the array.
| Table 1‑1 | |||
| Disk 1 | Disk 2 | Disk 3 | Parity |
| 1 | 1 | 0 | 0 |
| 1 | 0 | 1 | 0 |
| 0 | 1 | 0 | 0 |
| 1 | 1 | 0 | 1 |
| 1 | 1 | 0 | 0 |
| 0 | 0 | 1 | 0 |
| 0 | 1 | 0 | 1 |
| 1 | 0 | 0 | 1 |
| 0 | 1 | 0 | 1 |
This is a simple array with parity. In this case, the parity disk only stores the sum of the other bits expressed by a 0 or 1. If we lose a disk, we can know what was on it because we know what value would cause the parity to be even or odd.
We can can improve write speed and resiliency by using a RAID10 array. This will create two mirrors- data is mirrored between two pairs of drives that split the data between them. We get a 4x boost to read speed and 2x boost to write, as well as the ability to lose 2 drives. There’s also less overhead.
What’s the catch?
19.32
You’ll only get 1.8T of storage. If that sounds good to you, modify the mdadm command:
#Note: this is one (1) line
sudo mdadm --create --verbose /dev/md0 --level=10 --raid-devices=4 /dev/sda /dev/sdb /dev/sdc /dev/sdd
My opinion is that the write speeds you’ll get in RAID5 will be more than enough with gigabit networking. While RAID10 can lose more drives, I have included a spare hdd and you might as well get the extra capacity.
Now you know.
20/32
Step 4a: Samba
This is a little different than I’ve done it in the past, but it’s simple enough. There technically is a way to do it with the gui, but I’m not telling you how.
Required listening:
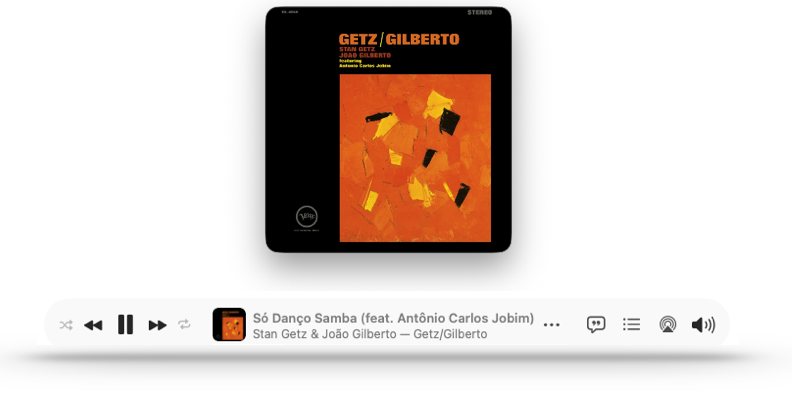
Continue listening to the rest of the album, then run these commands in the terminal:
sudo apt update
sudo apt install samba cifs-utils -y
sudo adduser shloobs sambashare
sudo smbpasswd -a shloobs
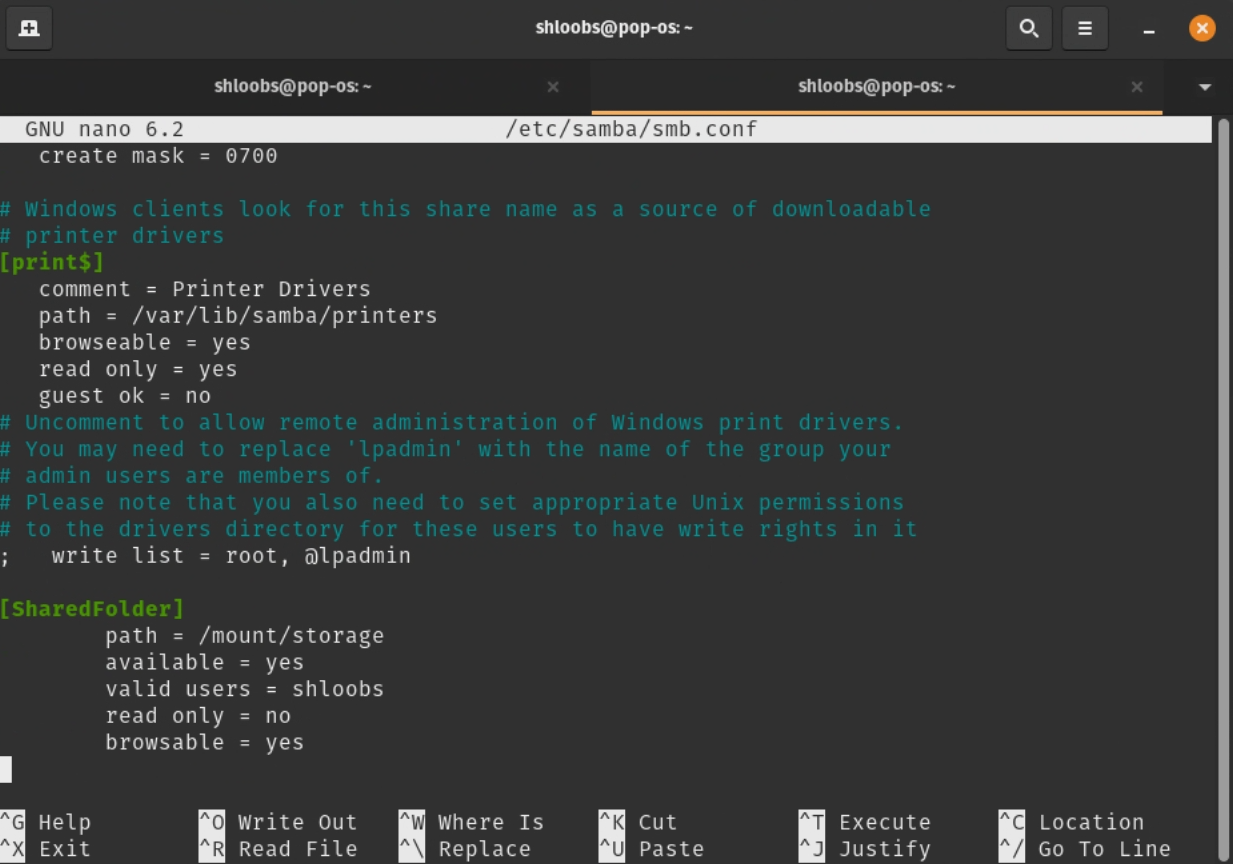
Then, open smb.confsudo nano /etc/samba/smb.conf
21/32
Add the following definition:
Add the following definition:
[SharedFolder]
   path = /mount/storage
   available = yes
   valid users = shloobs
   read only = no
   browsable = yes
22/32

lf you wanted to give me access to the network share, you’ll need to create a user.
sudo adduser Andy
sudo smbpasswd -a Andy
Give me a cool password, then make us buddies in the exclusive club:
sudo groupadd exclusiveclub
sudo usermod -aG exclusiveclub andy
sudo usermod -aG exclusiveclub shloobs
Change ownership and restart:
sudo chown 2770 root:exclusiveclub /mount/storage
sudo systemctl restart smbd
Change the line in smb.conf to:valid users = andy, shloobs
or
valid users = @exclusiveclub
If you wanted to use this computer as a print server, you probably want to use CUPS rather than smb. Linux CUPS is exactly like it is on macOS. The web interface is localhost:631, and it uses the lpadmin group.
A Brief History of CUPS
https://openprinting.github.io/cups
23/32
FSTÄB
/etc/fstab is where you list the locations you’d like you mount automatically.
#Note: this is one (1) line in fstab
//192.168.1.100/sharedfolder /mnt/shared cifs credentials=/home/yourusername/.smbcredentials,iocharset=utf8,uid=1000,gid=1000,nofail,x-systemd.automount 0 0
| Table 5 | |
| Field | Description |
| //192.168.1.100/sharedfolder | The SMB share path (replace with your server IP and share name) |
| /mnt/shared | Local mount point (create this directory first) |
| cifs | Filesystem type for SMB/CIFS |
| credentials=/home/shloobs/.smbcredentials | Points to a file storing your username and password securely |
| uid=1000,gid=1000 | Sets ownership to your user (check your UID/GID with id) |
| nofail | Prevents boot failure if the share is unavailable |
| x-systemd.automount | Enables on‑demand mounting via systemd |
| 0 0 | Dump and fsck options (usually left as 0 for network shares) |
This is also how we mount local disks. Remember that command we ran earlier?
/dev/md0 /mount/storage ext4 defaults,uid=1000,gid=1000,umask=000,nofail 0 0
I usually have copilot write them. Might as well, it wrote the one above, too.
SMB Credentials
Create a file in your home folder (or wherever):
nano ~/.smbcredentials
Add this:
username=your_smb_username
password=your_smb_password
Save and exit. Change permissions to just you:
chmod 600 ~/.smbcredentials
Point your fstab to that file.
I don’t usually bother with that, since I’m the only user and my SMB credentials are always different than the user credentials. If you want to be lazy with me, use in the fstab entry:
username=shloobs,password=your_smb_password
24/32
Step 4b:

Install some stuff
sudo apt update
sudo apt install samba samba-vfs-modules avahi-daemon
Fire up the ol’ nano and open /etc/samba/smb.conf
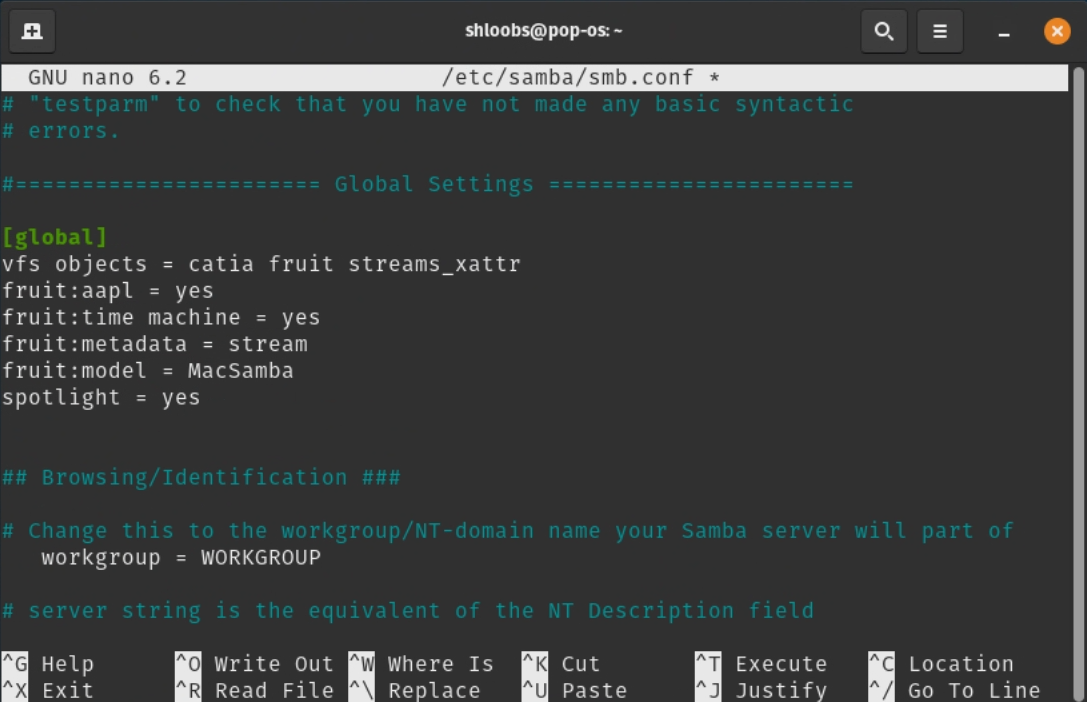
I can’t believe this is real, but add this to [global]
[global]
   vfs objects = catia fruit streams_xattr
   fruit:aapl = yes
   fruit:time machine = yes
   fruit:metadata = stream
   fruit:model = MacSamba
   spotlight = yes
25/32
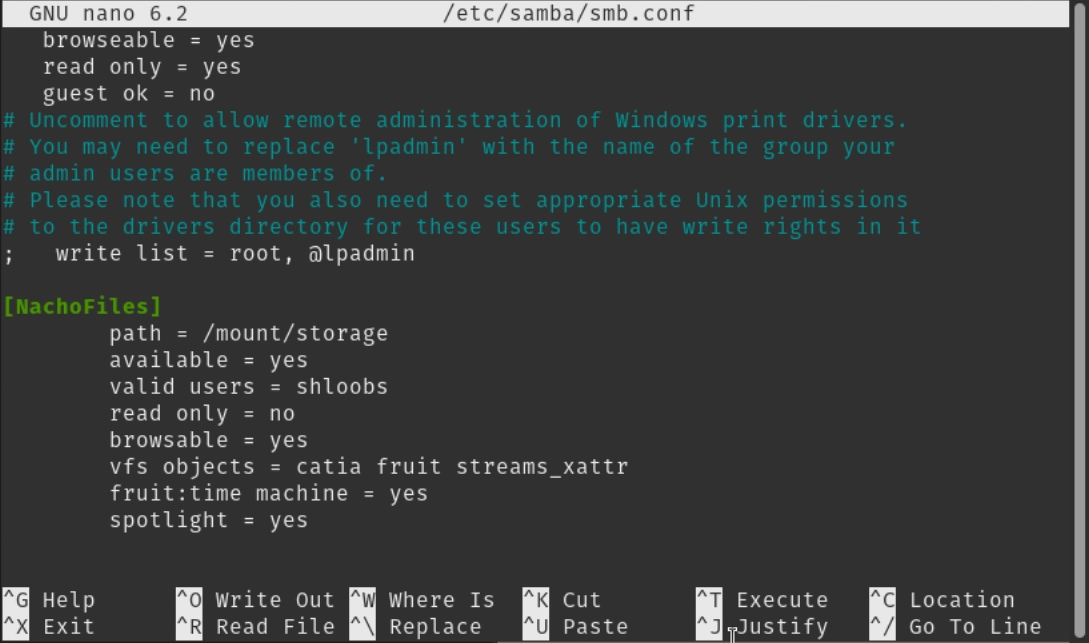
Then add this to the Network share we made earlier:
vfs objects = catia fruit streams_xattr
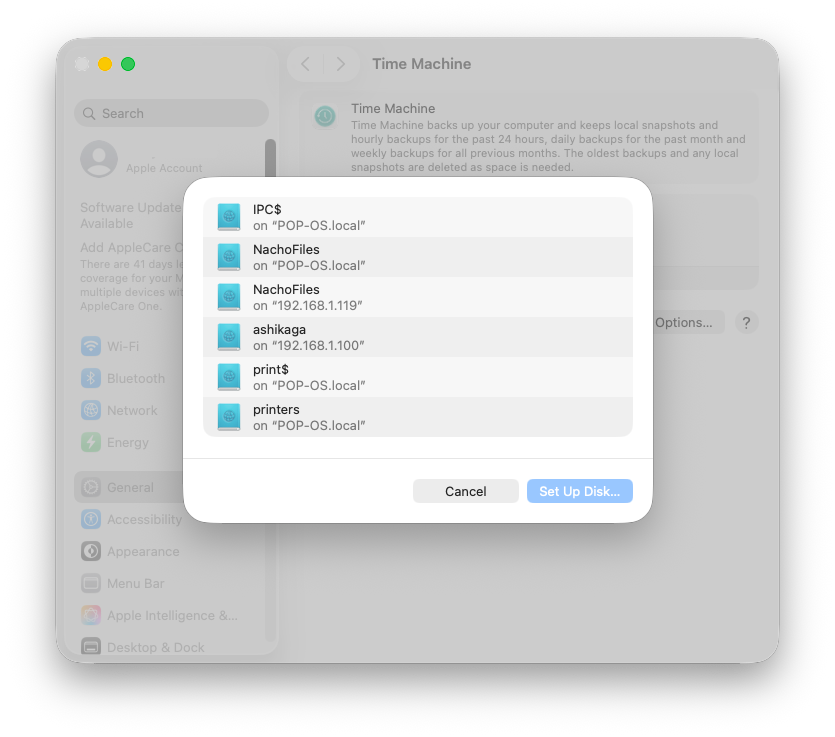
fruit:time machine = yes
spotlight = yes
Create the avahi service:
sudo nano /etc/avahi/services/smb.service
Add this:
<?xml version="1.0" standalone='no'?><!--*-nxml-*-->
<service-group>
  <name replace-wildcards="yes">%h</name>
  <service>
    <type>_smb._tcp</type>
    <port>445</port>
  </service>
  <service>
    <type>_device-info._tcp</type>
    <port>0</port>
    <txt-record>model=MacSamba</txt-record>
  </service>
</service-group>
In smb.conf, comment out:
#both [printers] sections
26/32
Change these lines:
	# Allow users who've been granted usershare privileges to create
	# public shares, not just authenticated ones
 	usershare allow guests = no

;   browseable = no

;[netlogon]
;   comment = Network Logon Service
;   path = /home/samba/netlogon
;   guest ok = no
;   read only = yes
Add these lines:
	[IPC$]
        hosts allow = 127.0.0.1 192.168.1.0/24
        guest ok = no
Note:
This might break access for Windows clients, so we’re just restricting IPC$ to specific subnets. You’ll still see it, but it’s at least a little hardened. If you grant me access, add the Tailscale IP/24.
27/32
Step 5 (optional): Home Media Server and Chill?
Plex vs Jellyfin
Plex Media Server | Pros | Cons |
Easily access away from home | HW video encoding requires Plexpass at $6.99/mo | |
Easy to Use | Login requires online authentication | |
Great Client Apps | Privacy Concerns | |
Jellyfin | Pros | Cons |
Built in HW encoding with ffmpeg | Requires a vpn like tailscale to access remotely | |
Clean Web Interface | Poor Client Apps (third party, some paid) | |
Open Source | Slightly more complicated setup |
Plex
Just like brew on macOS, you can install custom package managers like snap, flatpak, and appimage. We’re going to use snap:
sudo apt update
sudo apt install snapd
Install Plex:
sudo snap install plexmediaserver
Open Plex:
[Optional] Make a media directory:
Sudo mkdir -p /media
For remote access, you’ll want to open port 32400. This will vary depending on your router. It might help to know your MAC address. Unfortunately this computer also has a wireless NIC (no wifi cable needed) and I don’t know which one is which. While you’re at it, reserve an IP for your Neapolitan Gaming NAS ™.
ip link | grep ether
28/32
Jellyfin
Install dependencies
sudo apt install apt-transport-https wget gnupg2 curl
Add the repository:
wget -O - https://repo.jellyfin.org/debian/jellyfin_team.gpg.key | sudo apt-key add -

echo "deb [arch=$( dpkg --print-architecture )] https://repo.jellyfin.org/debian $(lsb_release -c -s) main" | sudo tee /etc/apt/sources.list.d/jellyfin.list
Install jellyfin and enable service:
sudo apt update

sudo apt install jellyfin -y\

sudo systemctl enable jellyfin

sudo systemctl start jellyfin
Open Jellyfin:
http://localhost:8096
For remote access, you’ll need to have Tailscale running on the server and the client device, and they’ll connect to the Tailscale IP, not the local one.
I haven’t really used Jellyfin, so I don’t really know the best client devices for iOS or Apple TV. The web interface is superb and it uses ffmpeg for hardware encoding
29/32
Alternatives
There are other ways of achieving this, but I thought using Pop! OS 22.04 LTS (long term support) would be both a deep and accessible learning experience.
You can vastly simplify the network share side of things by running a hypervisor OS and virtualizing the Gaming OS. These include:
| OS | Details | Cost |
|---|---|---|
| Proxmox | Might be the best to learn for potential enterprise applications. It is geared towards virtualization and containers using CLI tools. | Free |
| TrueNas Scale | NAS focused. Has good GUI tools, although virtualization support is not as mature as the others. Has native ZFS support which is nice. Debian based. | Free |
| Unraid | NAS, container, and virtualization in the GUI with access to the console. Has a very user friendly but very slow array method that allows for mixed disk sizes and filesystems. This is what I use. | Paid |
| Open Media Vault | Looks like it has NAS and docker support, but I don’t know much else about it. | I said I don’t know that much about it. |
| Windows | Don’t. You. Dare. |
Free ;) github.com/massgravel/Microsoft-Activation-Scripts |
You’re going to get the best performance out of Pop OS since you won’t be virtualizing anything, but it’s also the most effort. If you plan on running a lot of services in Docker containers, I would probably consider Proxmox or Unraid and pass through the GPU to a linux VM for gaming. Unraid can even run a full steamOS inside a docker container so you can share the GPU with Jellyfin and still have hardware encoding.
Things I run in docker:
- Frigate- an NVR that can use any IP cam with an RTSP stream
- Adguard- DNS filter
- Gluetun- Forward other containers through this with a wireguard vpn
- Qbittorrent- using BitTorrent to download linux ISOs helps take load off their servers
30/32
Assembly / Disassembly
You will need:
- 3mm allen wrench
Your Neapolitan Gaming NAS is built with 6 main parts:
- The bottom, which is actually two parts
- The motherboard tray
- The fan bracket
- Three top panels:
- Chocolate
- Vanilla
- Strawberry
It’s best to only remove one top panel at a time: the fan bracket only attaches to the top of them, so getting them aligned is kind of tricky when they’re all off. If you must remove all the panels, I recommend reattaching the front and back panels together with the fan bracket, then plug in the fan, USB, and power switch.
Keep in mind, the screws thread directly into the plastic, so it’s possible to over‑tighten and strip them. It’s usually pretty easy to feel when that’s about to happen.
31/32
THE GRAND UNIFIED WARRANTY OF COVERAGE™
For: One (1) Home‑Built Computer, Assembled With Love, Confusion, and Possibly Zip Ties
Issued: On the Day of Assembly, Under No Recognized Jurisdiction
PREAMBLE
Let it be known that the undersigned Builder, hereafter referred to as “You,” and the constructed entity, hereafter referred to as “Computer,” do hereby enter into this Warranty, which is enforceable solely within the mystical lands of Faerun and nowhere else.
ARTICLE I — DEFINITIONS
-
“Computer”
The collection of parts that you insist absolutely worked before you touched them. -
“Warranty”
This document, possessing the legal weight of a damp napkin outside Faerun. -
“Coverage”
Any perceived support, comfort, or justice, as interpreted by a caffeinated raccoon acting in good faith.
ARTICLE II — SCOPE OF WARRANTY
The Warranty shall apply only under the following extraordinary and improbable circumstances:
-
The Computer is unboxed during a solar eclipse while chanting:
“sudo make me a sandwich.” -
The motherboard has been blessed by a certified priest of the Church of Thermal Paste.
-
The system boots on the first attempt.
(Historical precedent suggests it will not.)
ARTICLE III — EXCLUSIONS
The Warranty expressly excludes, without limitation:
- Bent pins, broken dreams, or BIOS settings altered in a moment of righteous fury.
- GPU envy, RAM remorse, or PSU paranoia.
- Any component that was “working fine yesterday.”
- Any software that “works fine on my machine,” including mine.
- Software issues, hardware issues, firmware issues, or tissue issues.
ARTICLE IV — CLAIMS PROCESS
To initiate a claim, the Builder must:
- Submit a notarized letter written entirely in valid JSON.
- Provide a blood sample, a screenshot of the last successful boot, and a poem concerning Unix permissions.
- Await a response within 6–8 business eternities, which may arrive as:
- A fortune cookie,
- A cryptic Reddit comment,
- Or a message delivered by a confused carrier pigeon.
ARTICLE V — REMEDIES
If a claim is approved (a statistical impossibility), the Builder may receive one of the following:
- A coupon for 3% off a discontinued product.
- A sticker reading: “I void warranties professionally.”
- A strongly worded letter assigning blame exclusively to the Builder.
ARTICLE VI — ARBITRATION
All disputes arising from or relating to this Warranty shall be resolved through:
- A single roll of a D20, the result of which is final and binding.
- A dramatic reading of the system logs performed in iambic pentameter.
ARTICLE VII — FINAL PROVISIONS
- This Warranty is void where prohibited, discouraged, or mildly inconvenient.
- By reading this document, the Builder agrees to everything and nothing simultaneously.
- The issuer reserves the right to revoke, rewrite, or retroactively deny this Warranty at any time, including prior to the construction of the Computer.
Signed:
The Department of Dubious Guarantees
Office of Arcane Technical Support
32/32
WARRANTY REGISTRATION FORM
Form 0x16 — YOLOcast Protocol
Instructions: Please tear along the dotted line and fling this form into the nearest network socket.
Destination: 255.255.255.255
Port: I dunno. Pick the first one.
Protocol: UDP — Unreliable Documentation Protocol
✂️ — — — — — — — — — — — — — — — — — ✂️
OFFICIAL REGISTRATION DOCUMENT
SECTION I — PERSONAL INFORMATION
Name: ___________________________________________
IP Address (Static only): ____ . ____ . ____ . ____
Subnet Mask (for fashion purposes): ____ . ____ . ____ . ____
MAC Address
(must be handwritten in hexadecimal calligraphy):
Hostname: _________________________________________
Packet TTL (Time To Live):
- ☐ Eternal
- ☐ 1 Hop
- ☐ Already Expired
Preferred DNS Response:
- ☐ NXDOMAIN
- ☐ 127.0.0.1
- ☐ Magic 8‑Ball
SECTION II — SYSTEM DETAILS
CPU Type:
- ☐ Hot
- ☐ Overclocked
- ☐ Sentient
RAM Capacity:
- ☐ 8GB
- ☐ 16GB
- ☐ 32GB
- ☐ All of it
RGB Status:
- ☐ Tasteful
- ☐ Blinding
- ☐ Syncing with the moon
SECTION III — SIGNATURE
I, the undersigned, hereby affirm that I agree to the terms of the Grand Unified Warranty of Coverage™, acknowledge that my computer is probably haunted, and accept that this registration form will be shredded, burned, or used as a coaster.
Signature: _______________________________________
Date: __________________
Checksum (optional): __________________
Extra
Origins of the Ice Cream Design Philosophy
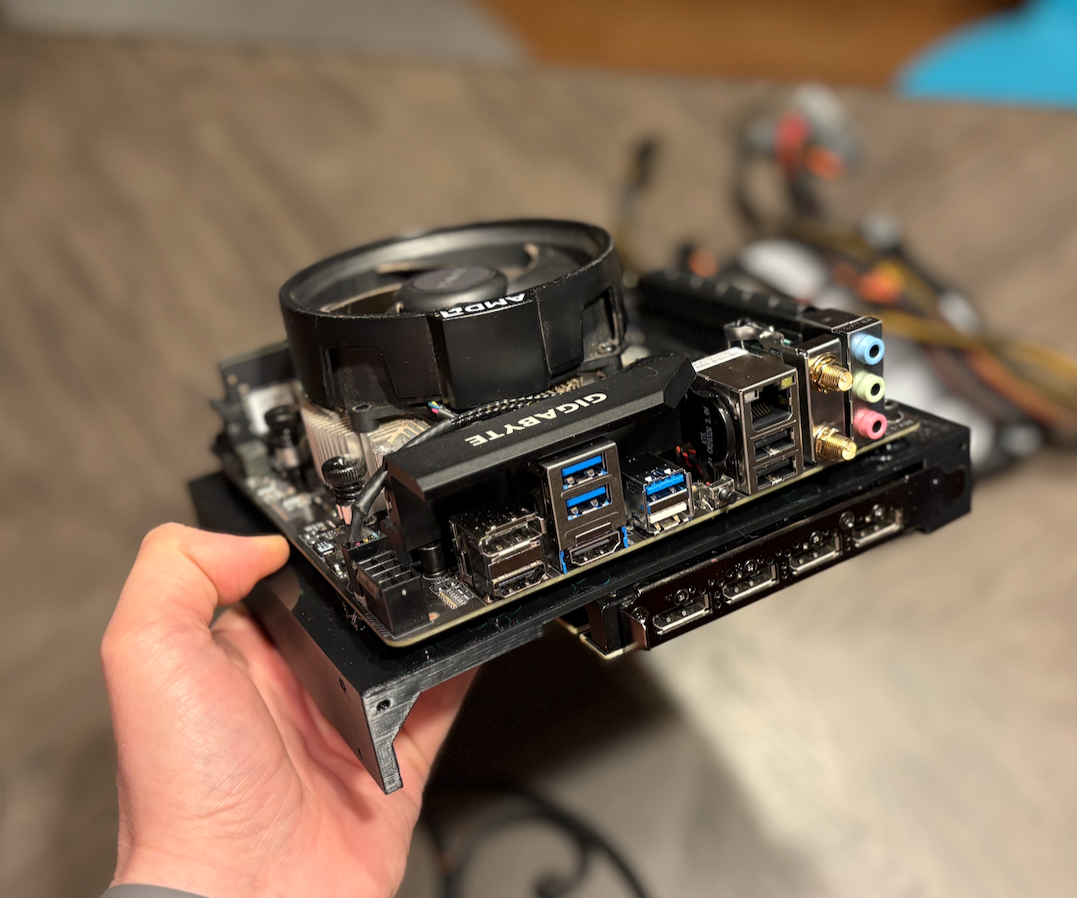
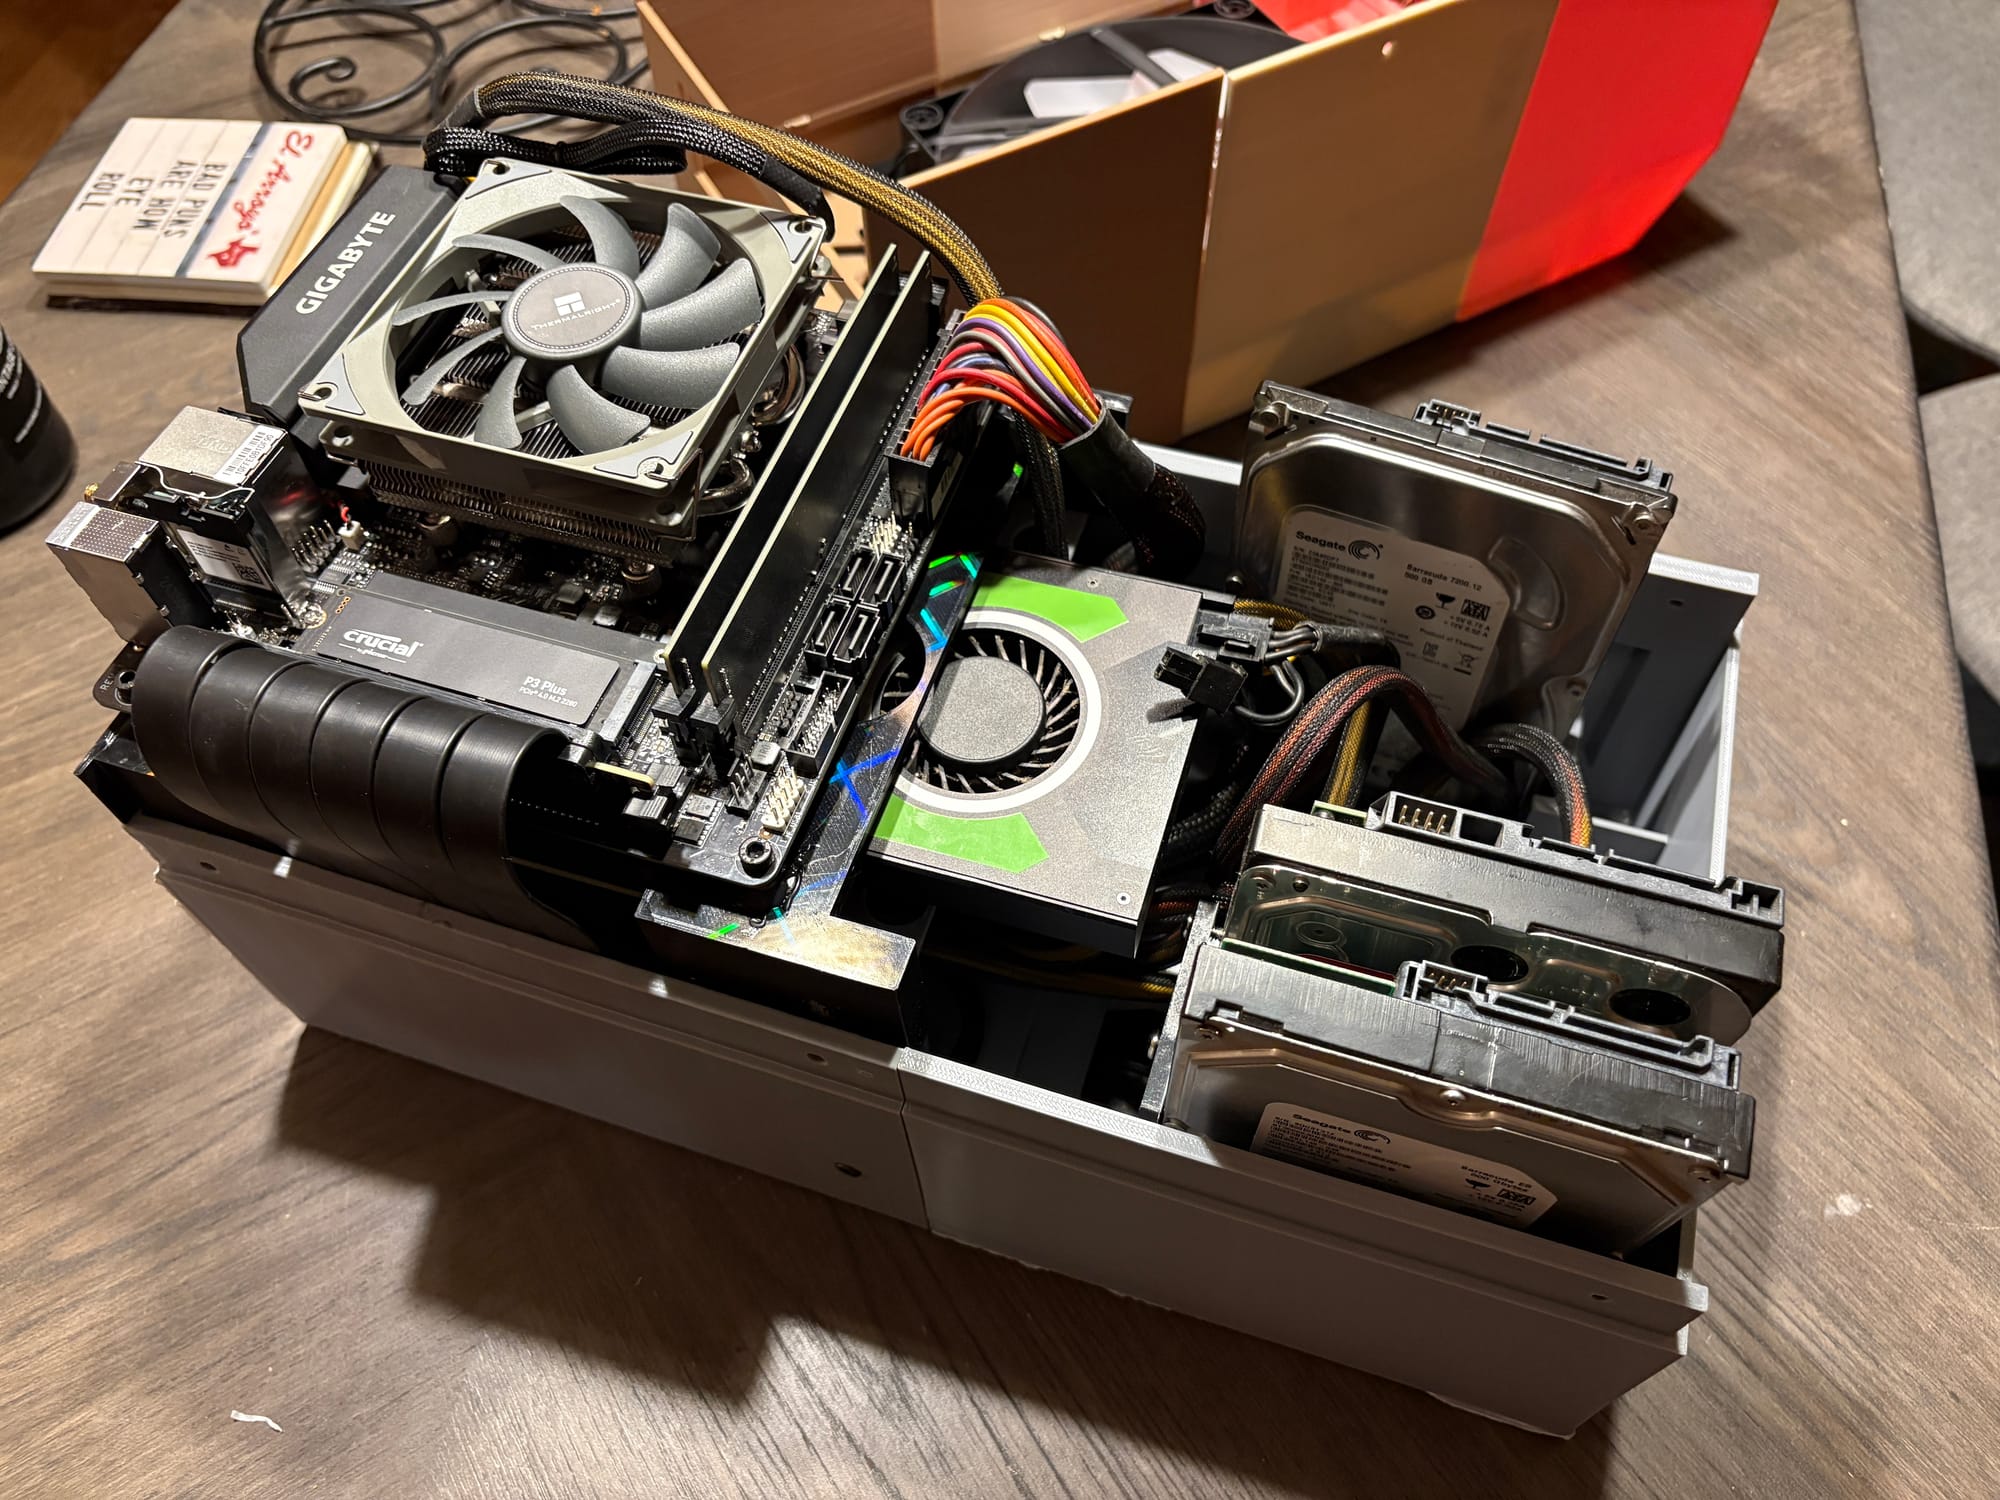
I already had a lot of the parts for this, and thankfully this was before the RAMpocalypse. I picked up an ITX motherboard and 16gb of ddr4. The rest of the machine is:
- Ryzen 5500
- Nividia Quadro P4000
- 512gb boot ssd
- 4x 1tb 2.5" laptop drives
The main design issue I faced was the size of the print bed on my Prusa Mk4s.This was an early prototype. Later, the bottom would be two parts.
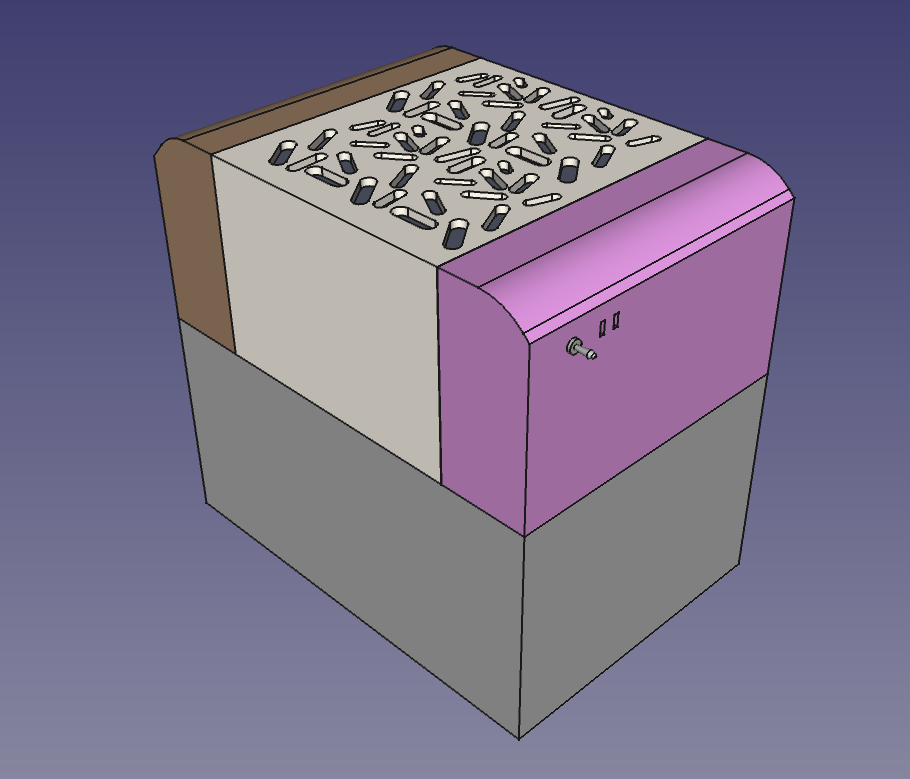
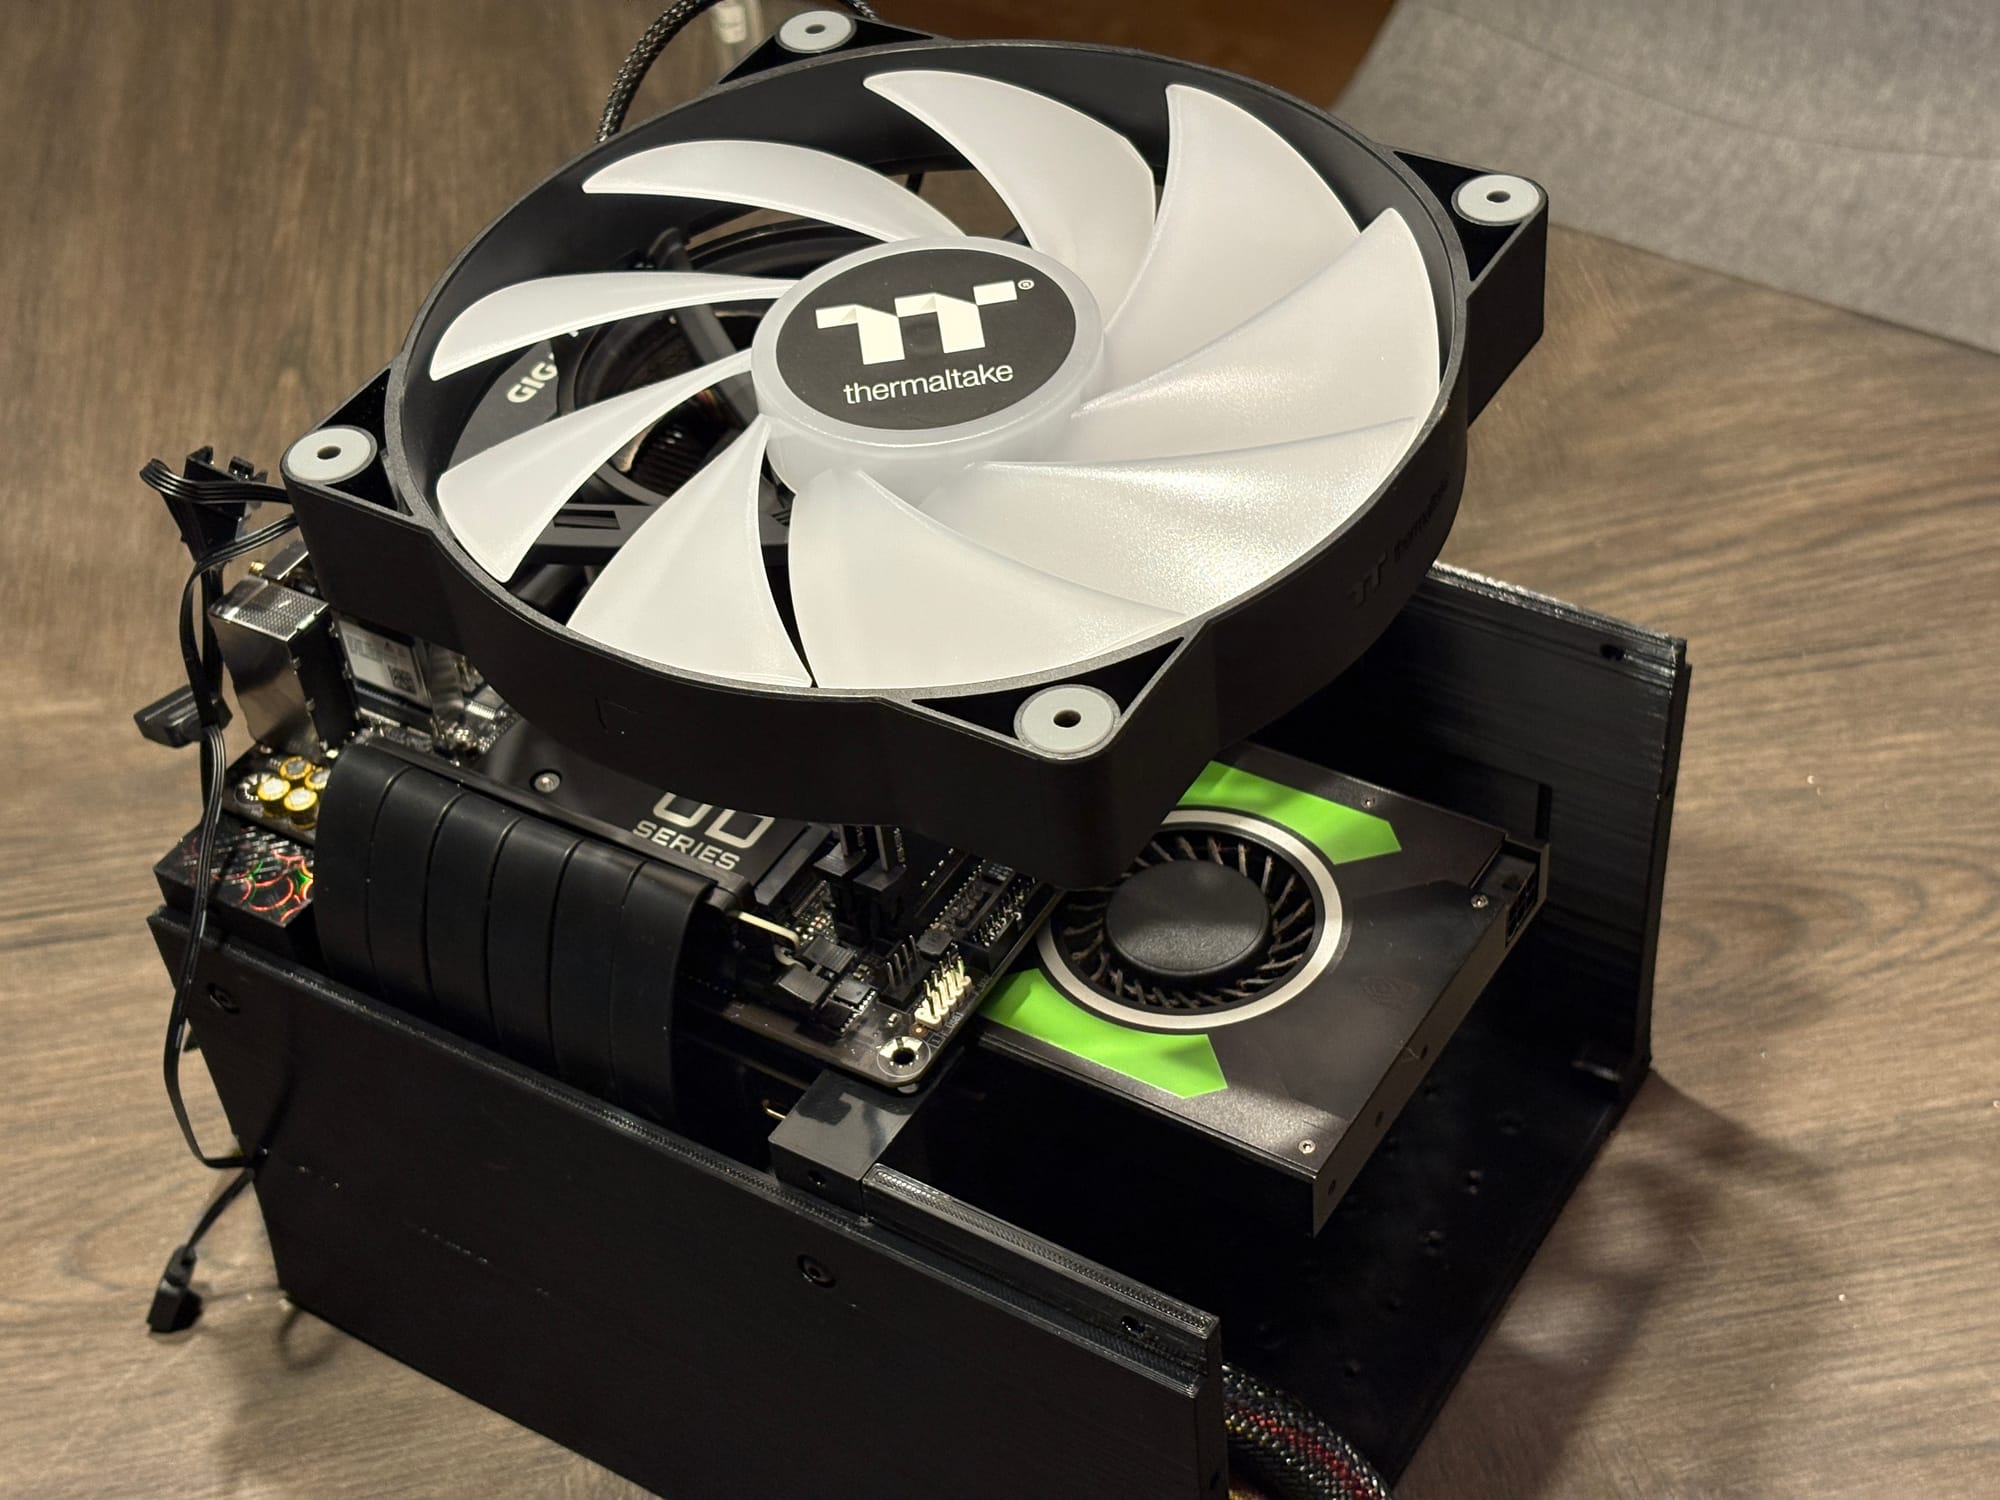
This is an early version of the layout, but pretty close to the final version. I have a Prusa Mk4S, so I was limited by the print bed size. I decided to do the bottom in two parts. The other part would hold the hard drives. The goal was to have that 200mm fan push air directly on the motherboard and gpu intake, with whatever bleeds off of that on the hard drives.
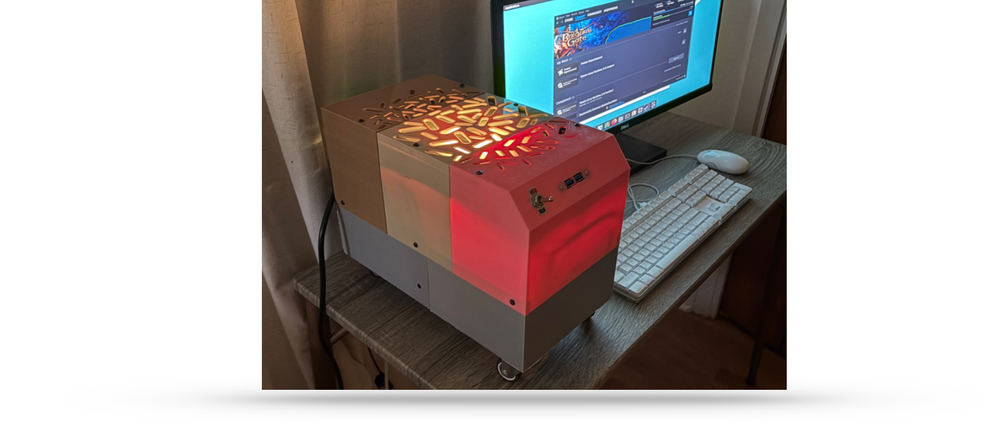
I also wanted certain parts to hold up under heat, so they were printed in ABS.
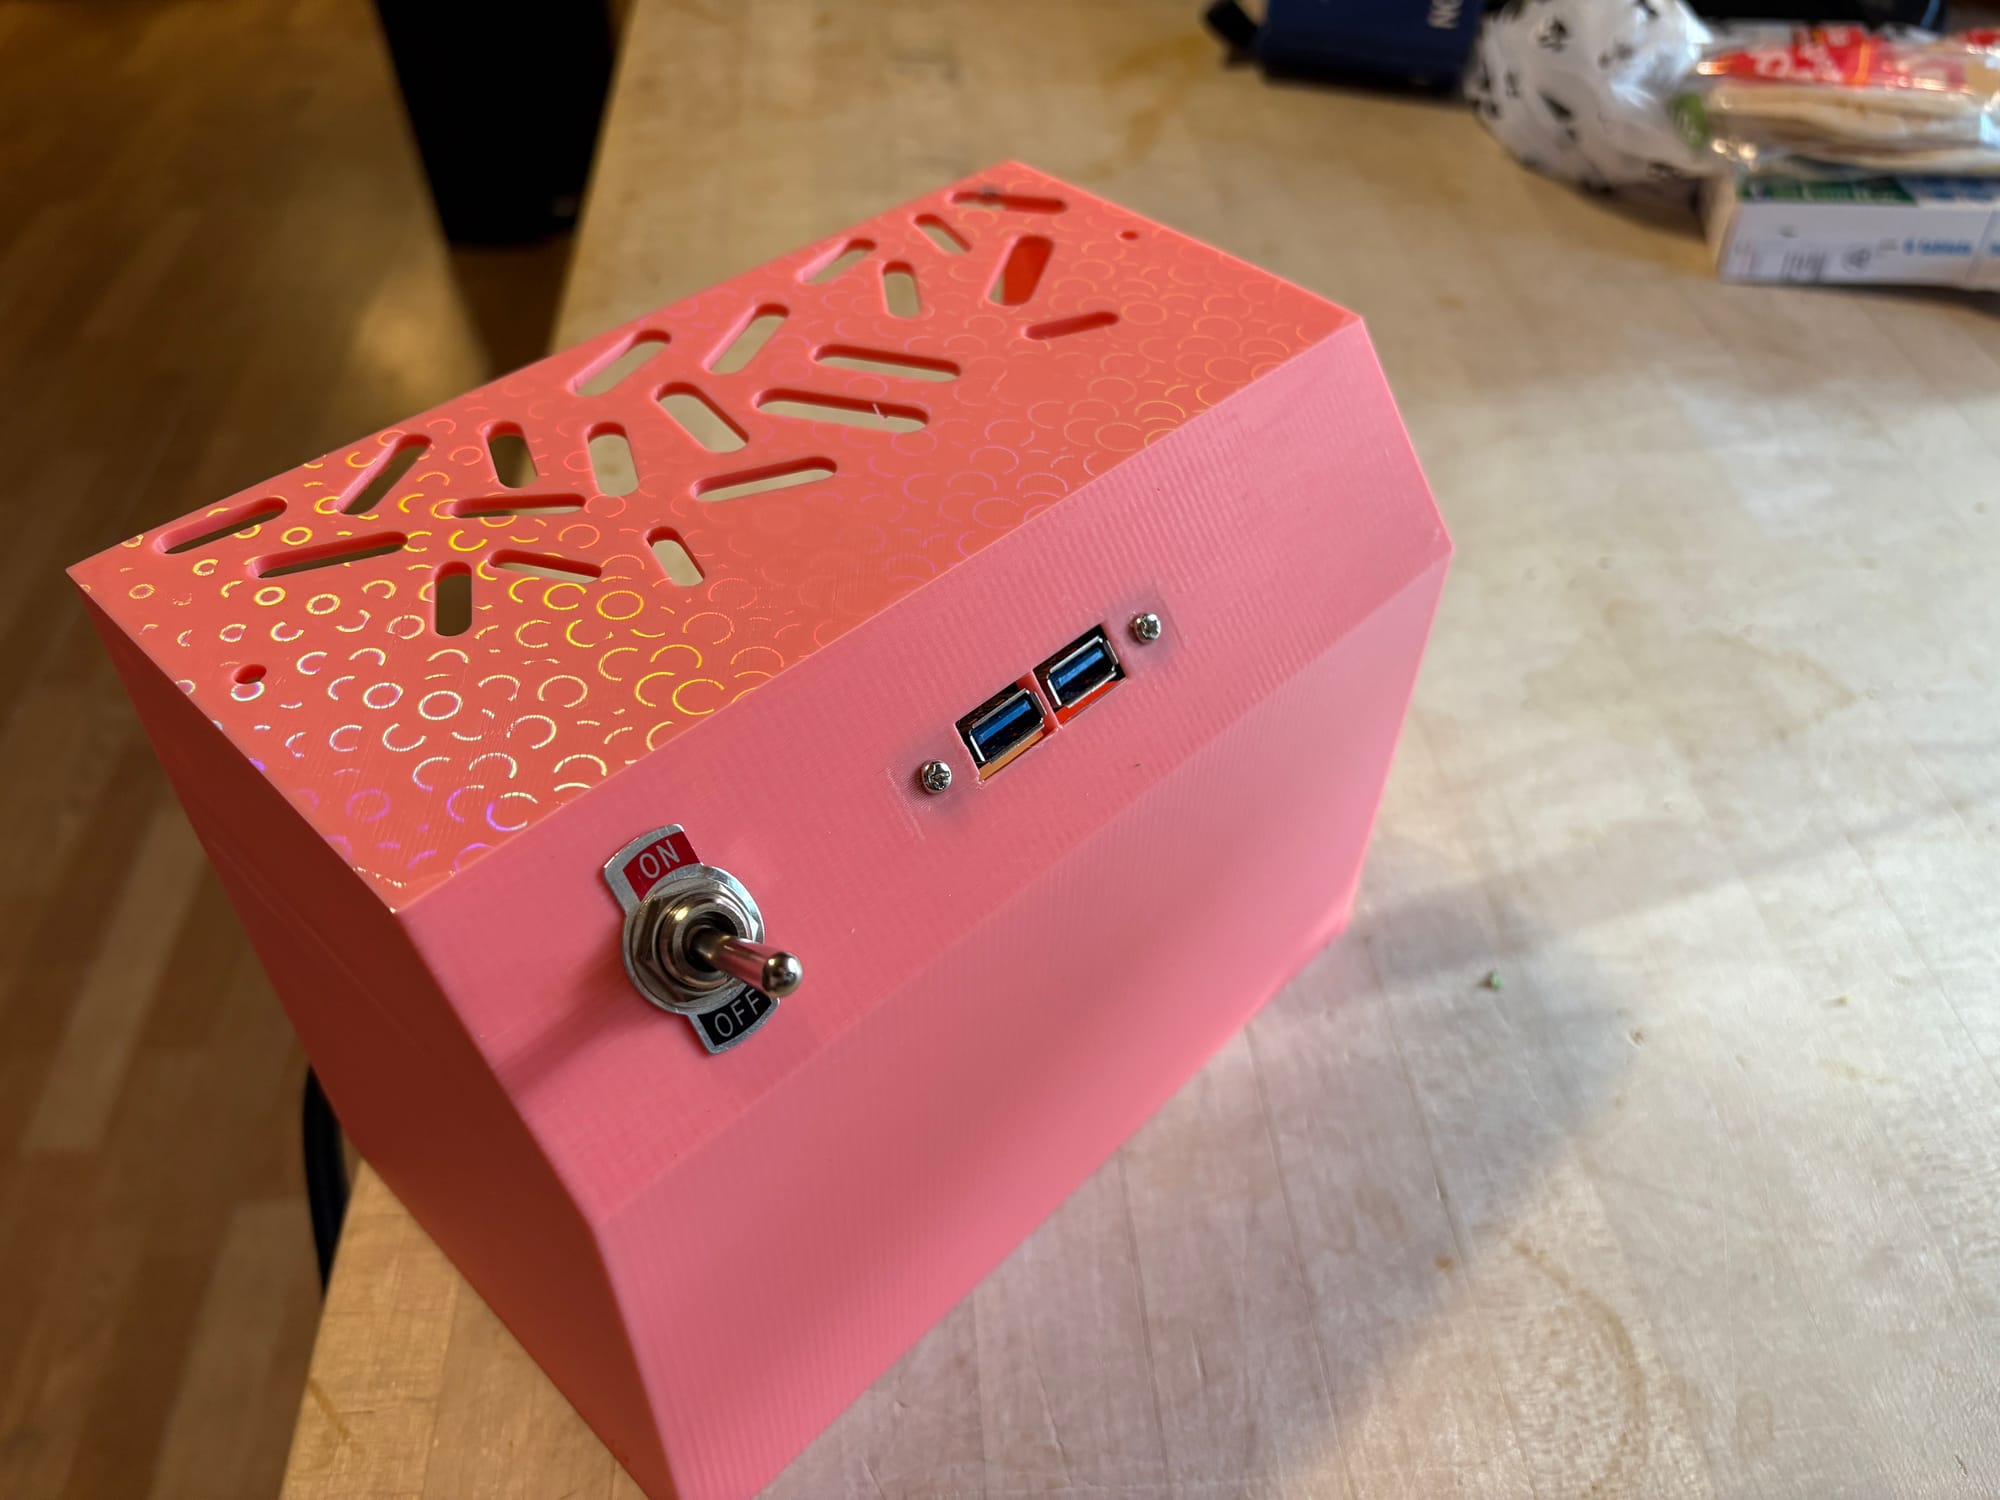
It took a lot of searching to find a momentary switch like this. Most are spst toggle switches. It's a little heavy for the weight of the machine, but it's still really satisfying.
I tested with 3x 3.5" drives, but I ultimate shipped it with the laptop drives. They're on sleds, so an upgrade to the bigger drives is relatively easy.
I still got some warping on the ABS parts, despite using a brim that I failed to trim.
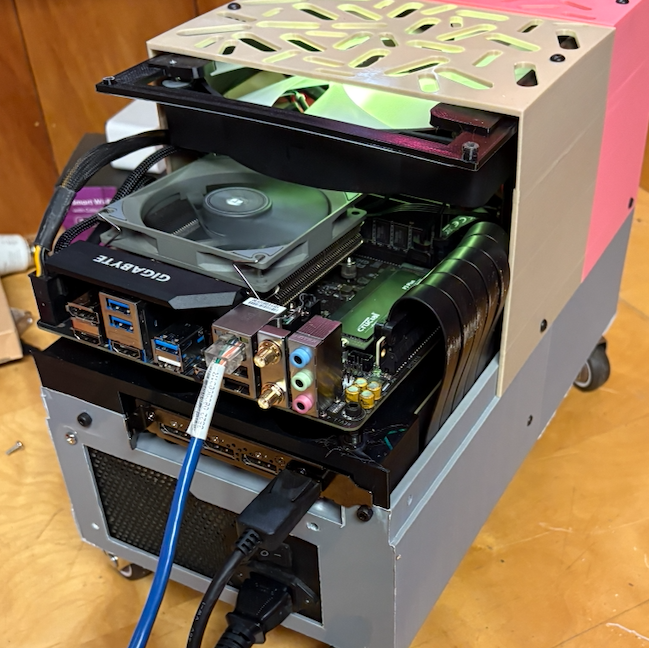
Everything fit together, mostly. The power supply is permanently in there.
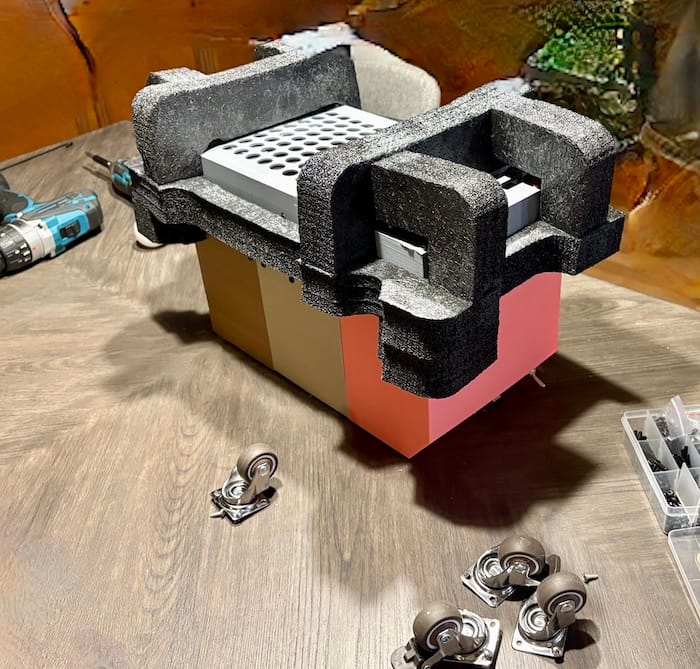
Turns out it fit perfectly in an Optiplex box- even the foam fit. And off it went to its new home. It survived.